https://gianigranite.com/blogs/giani-101-blog.atomGiani Inc. - Giani 101 Blog2022-07-19T13:02:34-05:00Giani Inc.https://gianigranite.com/blogs/giani-101-blog/small-project-kit2022-07-19T13:02:34-05:002022-07-19T13:12:27-05:00Small Project Kits Are Now AvailableMadison Geil
Your favorite Giani Granite 2.0 Countertop Kits are now available in a smaller size! If you loved our full-sized kit in your kitchen, our new Small Project Kit is perfect for your next DIY project. This kit covers up to 12 sq feet and includes our epoxy top coat for extra durability and shine.
The Small Project Kit is very versatile and can be used anywhere, in and out of the house. Some possibilities include:
Bathroom vanities
One piece sinks
Kitchen islands
Bar tops
Table tops
Coffee tables
Laundry rooms
Camper kitchens/bathrooms and more, so let your creativity flow!
This kit gives you the ability to update any surface or piece of furniture and can act as the perfect extension to your kitchen makeover if your countertop exceeds 35 sq feet.
Now available in our 5 granite colors, these kits come with everything you need to get started on your next project. Check out all of our color options, and instructional video below for application tips!
]]>
https://gianigranite.com/blogs/giani-101-blog/get-the-look-for-less-french-country-fab2022-06-28T13:33:40-05:002022-06-28T13:33:40-05:00Get the Look for Less: French Country FabMadison GeilGet the Look for Less: French Country Fab
This stunning look was inspired by Curated Interior's list of 19 Most Gorgeous French Country Kitchens. With our products, you can incorporate any design trend into your home and stay on budget. Below, we've complied a list of Giani products you can use to achieve this look for less.
Recreate the Look
To make this look yours, we recommend these Giani products:
This kitchen is the perfect blend of country chic and glam. The weathered look of the island balances the elegance of the chandelier. By adding polished gold hardware and fresh flowers, you can personalize this space to create the kitchen of your dreams!
Check out our websitefor all the color and design possibilities and our Pinterest board for more DIY inspiration!
]]>
https://gianigranite.com/blogs/giani-101-blog/giani-granite-2-0-whats-the-difference2022-05-16T10:26:05-05:002023-05-02T10:47:31-05:00Giani Granite 2.0 - What's the Difference?Jamie RichterMore]]>
Giani Granite is the kernel of an idea that set us on the path to revolutionizing the world of home improvement. For decades, Do It Yourselfers fell into a very small group of savvy, handy, and, what seemed like, impossibly brave people. It was almost as if DIY was an elite title, as if there was an unfairly distributed genetic component to those who could build, repair, and renovate with a sense of confidence and ease. But we realized it was all just perception when we made the first Giani Granite Countertop Kit. It was flawed thinking, nothing more.
As people who fell outside that tiny pool of skilled craftsmen and women, we just knew we could create products and a process that we could do ourselves. And if we could do it, so could everyone else. With 5 DIY granite styles and the education to go along with them, we’ve been working tirelessly to help everyone realize and harness their ability to transform their spaces, all on their own. That was 11 years ago.
Now, with several additional countertop kits, cabinet paint, brick transformation kits, and garage door makeover products, we realized it was time for a re-think of how we could best serve our rapidly-growing community. We returned to the beginning.
Giani Granite is now in its second generation. Available in both a 100% Acrylic formula, and with our Epoxy Resin Topcoat, we aim to give DIY-ers more choice when it comes to their home improvement journey. And it is that, a journey - one packed with wondrous new discoveries and achievements! So, we thought we’d break this down a bit and help you choose which Giani Granite Kit is right for you.
1. The Formula
Our 100% Acrylic formula kits are closest to the original classics. We reformulated all 5 styles to contain only water-based, acrylic components. And yes, that does include the topcoat, both the High-Gloss and High-Gloss Glitter versions. The IronCore Primer, the Mineral Colors, and Topcoat are all still safe, very Low VoC, and give off almost no odor. We want to instill the confidence that we care about the safety of you and your family, which is also why we applied the same safety principles with our Epoxy Resin Topcoat. In coatings terminology, it's made with 100% solids, and if you’re thinking that sounds like the formula contains no liquid, you are spot-on!
Liquids in coatings are generally either water or solvents, the latter being what contains the VoC content. Our Epoxy Topcoat contains no liquids, therefore, no solvents, and no VoCs. That’s right, it is Zero VoC! So, whichever style kit you choose, the environment of your home will remain unchanged. We want to leave your home better than it was before, gorgeous and not smelly.
2. The Look
This is where the rubber meets the road, the tell-tale difference between the two styles. Which one should I choose, and why? Well, it really comes down to one simple thing: the finished look.
The Topcoats in the 100% Acrylic Formula kits have a high-gloss, slightly textured finish when fully cured. If you’ve ever seen granite countertops in person, you’ll notice it has a bit of “tooth” when you run your hand over the surface. That’s exactly how our Acrylic Topcoats feel - just like natural stone. It’s durable, water-resistant, and with proper care, will last you for years. We still hear from people in our community who bought an original Giani Granite Kit - like from 2011 original, and their countertops still look gorgeous!
Look closely at the picture below of our White Diamond Kit applied over a standard laminate countertop. You'll see the differences in the look of the 100% Acrylic and the Epoxy Resin Topcoat versions.
3. The Application
The differences are minor. With both style kits, the primer and mineral color applications are identical. The only change is how you apply the topcoats. Since the Acrylic Topcoats are rolled on from a paint tray, they don’t require as much protective preparation, while the Epoxy Topcoat is poured directly onto the surface of your countertops and then gently spread to fully coat them. In order to allow the epoxy to self-level, and flow off of the counter to coat the front edges, we include a couple of plastic tarps so you can protect your cabinets and floor. You’ll spend a little extra time applying the tarps, but not enough to set you back when you’ve planned for a weekend transformation. That two-day time frame applies to both the Acrylic and Epoxy Topcoat kits.
4. The Cure Time
With both styles of kits, you only have to wait 48 hours before you can gently use your kitchen again. You can serve food, make coffee, wash dishes, and rest your glass of wine while you wind down at the end of the day. The only real difference is the time each type of topcoat needs to fully harden. The Acrylic topcoat takes 14 days and the Epoxy Topcoat takes 7. Epoxies dry and harden as a result of a chemical reaction by mixing two components, whereas acrylics reach full hardness by the process of water evaporation and absorption, which takes a bit longer. That’s it! Once each topcoat cures for the full, allowed amount of time, you are free to use your counters how you need/like/want.
5. The Cost
Time to address the elephant in the room. Why is one more expensive than the other? It all boils down to one simple thing: formula. Without getting into the deep weeds and dredging up unpleasant memories of 10th Grade Chemistry, epoxies are more costly to make. Due to the raw materials used, the manufacturing processes, and the time involved, they inherently carry a bigger price tag. That stated, it doesn't mean that one is inherently better than the other. Both of our topcoat systems are easy to work with, exceptionally strong, and designed specifically for the high usage, wear, and tear of countertop applications. Regardless of which look you choose, you can rest assured that you're getting good stuff!
Pretty painless, eh? And to make it even more palatable, here are the instructional videos for applying both styles of kits, so you can actually see the differences. Now, all you have to do is grab a kit, and get started.
Cheers, fellow DIY-ers! We got your backs!
]]>
https://gianigranite.com/blogs/giani-101-blog/3-reasons-fast-fashion-home-trends-suck2022-03-29T12:00:00-05:002022-05-16T08:58:34-05:003 Reasons “Fast Fashion” Home Trends SuckTyler LeonardFast fashion sucks. But you probably already knew that. It’s been widely reported that companies like H&M and Zara are associated with dubious business practices, including subjecting their employees abroad to some pretty grim work conditions; to say nothing of their environmental impacts. But what about fast home fashion?
]]>
Fast fashion sucks. But you probably already knew that. It’s been widely reported that companies like H&M and Zara are associated with dubious business practices, including subjecting their employees abroad to some pretty grim work conditions; to say nothing of their environmental impacts. But what about fast home fashion? Home design trends change almost yearly, meaning that for a lot of homeowners, keeping up can be a pretty daunting challenge — and fast fashion a potential option. Let’s briefly take a look at three reasons why fast home fashion is a less-than-viable solution to rapidly changing trends.
#1: Cost
On average, a full bathroom remodel costs about $10,000. Most people don’t really have that kind of cash laying around. Even something as simple as replacing bathroom vanities averages about $1500; so if you plan on being up with the trends, you might be looking at quite the bill. Less measurable but just as important is the time and effort investments required to keep your home “up-to-date” by Instagram standards. Why not invite more flexible solutions? Giani Paint Kits (along with other DIY products) make it possible to update counters, cabinets, and even appliances at a fraction of the monetary and time investment. And if you change your mind later? You have the luxury to do so.
#2: Impact
Fast home fashion is not sustainable. There are environment and real-world market consequences to tearing out and replacing everything in your house to stay abreast of current trends. If you’re environmentally conscious, one potential salve might be to investigate the new circular economy model of home design. But just as viable is DIY! Giani Paint Kits give you the option of transforming your current countertops, cabinets, doors, and appliances — negating the need to scrap, replace, or remodel. Not to mention you’re going to be saving an actual boatload if you go this route.
#3: Hassle
The average kitchen remodel takes between six and twelve weeks. Unless you really dig eating out, cleaning up your contractor’s boot prints, and being subjected to loud noises, we’re comfortable asserting that a Giani Paint Kit (which takes all of a few hours to apply to your cabinets, countertops, or appliances) is a vastly more manageable prospect; both in time and cost. And if you’re not a born DIYer? Fear not. Giani Kits are about as easy-to-use as any product on the market; our Amazon reviews say as much.
In summary: if you’re not made of money, unconcerned for the fate of the environment, unflappable in the face of remodeling hell, or have your heart really set on getting your HGTV on, then check out our DIY Paint Kits and make your life a little easier!
]]>
https://gianigranite.com/blogs/giani-101-blog/the-ultimate-guide-to-apartment-makeovers2021-01-05T08:50:35-06:002021-01-05T08:57:50-06:00The Ultimate Guide to Apartment MakeoversTyler LeonardApartments aren’t very easy to design due to their limited size and remodeling options. But that shouldn’t stop you from making some changes to make it feel like home. In this article, we’ll be listing five crucial tips that you’ll need for your apartment makeover. Happy decorating!
]]>
Apartments aren’t very easy to design due to their limited size and remodeling options. But that shouldn’t stop you from making some changes to make it feel like home. In this article, we’ll be listing five crucial tips that you’ll need for your apartment makeover. Happy decorating!
Colors and tones are important in setting the mood of your apartment. We recommend choosing lighter shades, as they tend to make spaces seem bigger, then throwing in a couple of darker accent colors for variety. Walls are usually best painted with light colors, while the darker tones can go on the furniture. If you’re thinking of painting your cabinets and countertops as well, it’s important to choose your paint carefully. Note its undertone, how it looks under different kinds of light, as well as the colors it will be paired with. For example, a bright teal dresser might look cute on its own, but it doesn’t pair well against a light orange wall.
In smaller living spaces, every inch counts. You can free up some floor space by buying furniture pieces that have two or three different uses! Ottomans that double as storage bins are a great choice. Beds that can be folded into sofas can be pretty handy for particularly tiny spaces as well. Whatever you choose, don’t forget to check its size to ensure that it’ll fit in your apartment. Furniture that’s too big will only make your space look cramped!
Spruce up your living space with some decor. Artworks, knick-knacks, fancy wall fixtures — anything you want! Paintings are an easy choice, as they can easily brighten up an empty wall. Choosing the right artwork can be tricky, but it all boils down to the space you have to work with and your personal taste. You should also take into account what the room you’re designing is used for. For instance, bedrooms should be decorated with calming artworks since they're a place to rest. For your office or workspace, choose art pieces that motivate or inspire you.
Planning your project can be really exciting, but sometimes all the budgeting and conceptualizing can get a little overwhelming. That’s why you might want to consider hiring a professional to help you out. Your best bet would be interior decorators and designers. They can bring a trained eye and a professional touch into the process, helping make sure that your makeover is a success. That said, know that there’s a lot that goes into starting an interior decorating business, which means that you’ll need to do your research and look into your prospective designer. Certifications with the National Council for Interior Design Qualification are always good to see, and it’s important to ask about their experience and rates. This way, you’ll know if they’re the right person for the job. Of course, this is entirely optional. You can always go the full DIY route, so that everything is up to you to decide. Just make sure to plan thoroughly and source quality materials!
Makeovers might be a one-time thing, but maintenance isn’t. To keep your apartment comfortable and visually pleasing, clean it regularly. Throw out those old receipts and unimportant documents, then sell or give away the furniture you no longer use. It’ll give you more room to navigate and repurpose. Having a decluttered living space also improves your ability to focus. This is because there are fewer stimuli to steal your attention away from the current task. Given that, you might want to start cleaning out your workspace more regularly.
Keep these tips in mind, and your makeover is sure to be a success! If you’re looking for a neat color palette, head on over to our store page for some gorgeous antique-styled paints. They’re sure to breathe life into your apartment. Plus, they’re great pairs for darker accent colors.
]]>
https://gianigranite.com/blogs/giani-101-blog/5-winter-design-trends-to-incorporate-into-your-kitchen-design2020-11-24T13:23:53-06:002020-11-24T13:23:53-06:005 Winter Design Trends to Incorporate into Your Kitchen DesignTyler LeonardRedesigning your kitchen can be one of the best things you do for your house. With it typically serving as the center gathering place of the home, it’s important to make it comfortable for anyone cooking, eating, or just passing through. But, with so many kitchen styles out there, many wonder how they can create a modern kitchen design that is still authentic to their individual style. Luckily, this winter we have already seen a range of new styles and trends become popular and they can easily be personalized to fit your own kitchen. So, if you need a little more inspiration for your new kitchen design, keep reading for winter trends you can try.
]]>
Redesigning your kitchen can be one of the best things you do for your house. With it typically serving as the center gathering place of the home, it’s important to make it comfortable for anyone cooking, eating, or just passing through. But, with so many kitchen styles out there, many wonder how they can create a modern kitchen design that is still authentic to their individual style. Luckily, this winter we have already seen a range of new styles and trends become popular and they can easily be personalized to fit your own kitchen. So, if you need a little more inspiration for your new kitchen design, keep reading for winter trends you can try.
1. Bold Color
Color has officially made its way back into modern kitchens and it’s definitely here to stay. With the large amount of all-white kitchens that we saw in the early 2010s, we’ve finally seen kitchen designs transition to be a little more vibrant this year.
While bright teals and peach tones are seen in some traditional and farmhouse-style kitchens, there has been an overwhelming draw to dark blue and black colors across a range of designs. Whether it be with dark walls or cabinets painted completely black, we expect this somber look to continue as a trend well into 2021. You may be wondering how to stylize a completely black kitchen. One way to do this is to bring in warm tones throughout the rest of the design to create a luxurious feel and personalize the trend to fit your unique style. To brighten up the space, you can contrast the black with a white or light-colored countertops or fixtures.
2. Warm Accents
Similarly, many homeowners have looked to warm-toned fixtures, floors, appliances, and accents to bring a cozy feel into their kitchen design. With many of our kitchen layouts including open floor plans and sleek finishes, warmth can easily get lost in the space and create a colder atmosphere overall. However, the addition of unique accents gives you the opportunity to incorporate metal, jewel, and wood tones into your design to bring warmth back into the kitchen.
Most common in many rustic designs, brass and copper fixtures have been popular and this winter, they are being seen more in other design styles. Kitchens with jewel-toned cabinets and countertops have found warm metals and gold colors to complement those features nicely. However, if you are opting for a lighter-colored kitchen, warm tones can be brought in through wooden tables or leather stools and seating.
This trend, specifically, is perfect for personalizing your space because there are hundreds of ways to incorporate warm tones and accents and draw attention to your kitchen. You can use this trend to stylize the main components of your kitchen design and bring balance back to the space.
3. Unique Shapes
Again, when adding accents and fixtures into your kitchen, we have seen a huge trend toward unique shapes. Whether it be with geometric light fixtures, a rustic-style faucet, or even a creative backsplash, this trend is the perfect way to bring your unique touch into the space. If you have selected a simple kitchen design and aren’t looking to add bold colors and patterns, this may be the perfect way to create subtle character in your design without it becoming too eclectic.
Conversely, you can combine your unique shapes with your vibrant kitchen design to create juxtaposition and style contrast in your space. This is a great way to showcase small pieces of your own creative style as well.
4. Customizations
Customizations have always been popular for cabinetry; however, it’s beginning to expand into other parts of the kitchen as well, specifically within storage, appliances, and seating. Though it is a style loved by many, the price point has always been a setback for homeowners redesigning their kitchen. However, with many individuals finding new ways to save and pay for the renovation with their home’s equity or additional lending, customization has found its way back to the forefront of kitchen design.
Storage is an absolute must in any kitchen; however, not every home comes with a separate and spacious pantry. So, instead, many homeowners are beginning to include custom, built-in storage systems into their kitchen designs. They often are separate units from the cabinets and in some cases, cover an entire wall of a kitchen. The concept behind them is very similar to china cabinets that are popular in many older styled homes; however, the built-in aspect gives it a modern twist.
Modern kitchen designs are also using built-in customizations to conceal bulky appliances. Instead of finding a way to integrate a steel appliance into your well-thought-out design, you can take advantage of custom doors, drawers and hoods to hide your appliances and match your aesthetic.
Additionally, with the new at-home lifestyle and pandemic-fueled cooking trends that many of us took on this year, seating areas have become popular again to accommodate large families. While a simple table set may match a modern design, midcentury, rustic, and traditional kitchen styles are beginning to incorporate custom banquette seating instead.
5. Double Island
With many homeowners prioritizing square footage in their kitchen designs, it encouraged the implementation of not one, but two islands in the center of the space. There is an undeniable need for more counter space in any kitchen and for at-home chefs, and this double island design has been a favorite recently.
Also, as many families have moved away from formal dining tables and relied on bar and stool seating, the need for a separated eating and cooking space has become apparent. It is common to use your island for meal prep and eating; however, with a double island, you can easily separate the two — which is actually a safer option. Some kitchen designs even allow one island to house the sink and stove to create a simple space to cook your meals.
When it comes to budgeting two islands into your kitchen plans, it’s actually not as daunting as you may think. More homeowners have started using affordable alternatives as opposed to splurging on expensive marble and granite countertops. You can actually get the same marble or granite look for a fraction of the price by using a countertop paint kit which allows you to customize and design your own marble, granite, slate, or white diamond countertop exactly how you want it. Even if you prefer a wooden, butcher block counter on your island, you can use the paint kit to give you the same look without the added maintenance that comes with installing a pure wood countertop. Small strategies like this one can give you much more room in your budget to match the popular double island trend.
Designing your kitchen can be a fun project to take on, so be sure to incorporate some of these new trends into your space this winter. Don’t forget to add some personal touches and you’ll truly be able to achieve your dream kitchen in no time.
]]>
https://gianigranite.com/blogs/giani-101-blog/refreshing-your-home-5-tips-and-tricks2020-09-25T08:46:36-05:002020-09-25T08:50:05-05:00Refreshing Your Home: 5 Tips and TricksTyler LeonardMore]]>
Image credit: Unsplash
Making a few upgrades to your home is a great way to breathe new life into it. After all, personal styles and design trends change — and your home can be the perfect reflection of that. Refreshing your home also adds to its value. Should you wish to sell your property in the future, you might be able to get a better deal on it.
To help you get started on your home improvement journey, we’ve listed five key tips that are key to remember:
1. List your goals and create a timeline
Image credit: Pexels
First, write down your goals. Maybe you simply want to beautify your house, make specific renovations like adding an extension, or boost the value of your property. Knowing these goals can help you create a more concrete plan and create a working timeline.
To give you some idea, House Beautiful’s guide to renovation timelines states that how long a project takes really depends on how elaborate your plans are. Adding a room can take up to 16 weeks to complete, while renovating a bathroom generally requires at least three weeks. Of course, minor renovations will not take as long. For example, replacing your roofing will likely be a two-day project. Regardless of your home project, a timeline can let you know what to expect. Your family can also plan their days around these changes.
2. Set a realistic budget
Image credit: Unsplash
Listing specific goals can help you figure out how much your home improvement project will cost and how you’re going to fund it. If it’s something simple, you might not need to dip into your savings.
But, say you want to remodel your kitchen. That requires a bigger budget, and there are different ways for you to raise funds for it. One way to do so is to apply for a home improvement loan. Marcus states that home improvement loans are given to homeowners who want to finance renovations but don’t have enough equity. A loan is also a good option for homeowners who don’t want to pay for renovation costs upfront. Think of upgrading your house as a form of investment. Not only does it minimize the need for costly repairs later on, but a well-designed and maintained property is also more attractive to homebuyers.
3. Don’t underestimate the little details
If you have a limited budget, changing the details can give your place a minor facelift. Change your linens, window treatments, and rugs. Adding statement pieces and wall art here and there can also make it more in vogue with current trends. Consider bringing more life indoors by putting up some plants. Inhabitat suggests setting up your own herb garden by the window, which you can use to add more flavor to your cooking. Hanging up plants from the ceiling or installing a shelf for indoor greenery are great ideas, too!
4. Try changing the interior’s theme and layout
Redecorating is another effective way to give your home a new look. Try repainting the walls and fixtures to change the overall theme. For example, a Brick Transformations Whitewashed Kit can be applied to give your home a more industrial feel to it. Not only will repainting change the style, but the right paint can also maximize your indoor space.
In some cases, rearranging the furniture can also do the trick. You might want to consider completely changing the layout by breaking down some walls. An open floor layout is a timeless trend that adds light and space to your property — just be sure to consult with a builder!
5. Boost curb appeal
While most people tend to focus on refreshing their indoor space, boosting curb appeal should be part of your home improvement project, too. CNBC consulted with real estate experts who agree that a house is judged within 30 seconds. And given that the exterior is the first thing people notice, upgrading it can instantly make any home more attractive.
Fortunately, there are several ways to improve curb appeal. Start by paying attention to your lawn, repainting the fence, and keeping the driveway in good shape. Some more elaborate changes include repainting the exteriors, adding a deck, and upgrading your roof.
Refreshing your home will help it stand out for all the right reasons, and make you proud to call it your space. Just be sure to keep these things in mind to make your home improvement project a success.
]]>
https://gianigranite.com/blogs/giani-101-blog/giani-epoxy-dos-and-donts2020-08-12T14:56:00-05:002023-04-25T11:31:51-05:00Giani Epoxy Resin Do's and Don'tsJamie RichterMore]]>
The Do's and Don'ts of Giani Epoxy Resin
The Do’s:
Do… make sure you have everything you need before starting. Have a list and make sure it’s all checked off.
Do… make sure you properly prepare your surface before pouring your Giani Epoxy Resin onto your primed countertop.
Do this by de-glossing your countertop surface, remove any caulk, patch any deep nicks or seams with wood filler.
Do… mask everything off – Epoxy can be a messy job! If you don't want Epoxy on it, cover it!
Mask: • the floor • under the cabinets • where you will be mixing the Epoxy • your back splash This will make cleaning up a breeze!
Do… pour your activator into your resin can properly and precisely and stir for the amount of time indicated on your instructions.
Do… bring room temperature to 72-75 degrees, 2-3 days before you pour your Epoxy. Maintain the temperature for another 24 hours to allow the countertop to cure properly.
Do… be aware of when your countertop will cure.
The Don'ts:
Don’t… rush the mixing process. This is the most vital step in ensuring your product cures properly. If improperly mixed, it can result in soft spots or tacky areas that will not cure.
Don’t… stop and start… once you start, you need to finish.
Don’t… leave excessive product sitting in your mixing container. By doing so, the excessive amount of product left in the container will flash, bubble, heat up, cure at an extremely fast rate and potentially crack. Once the product is properly mixed, pour it out on your surface immediately. (Within 30-40 minutes).
Don’t… over work your surface – Once you pour the product out you want to spread the product across in smooth even strokes. Take your time in ensuring the product is level across your entire piece.
All in all, it's not difficult to work with Giani Epoxy Resin. And the end result is absolutely beautiful! The shine is amazing and the durability is hard to beat!
\
]]>
https://gianigranite.com/blogs/giani-101-blog/10-ways-to-use-dishsoap-around-your-home2020-08-03T08:36:00-05:002020-08-03T08:36:44-05:00Dish Soap: Your "Go-To" Household CleanerJamie RichterMore]]>
Dish Soap: Your “Go-To” Household Cleaner
Dish Soap, dishwashing detergent, dishwashing liquid, whatever you may call it is used for much more than you would ever imagine. The specialized form of soap that contains a mixture of surfactants that are especially high-foaming and chosen because they do not irritate the skin. This special mixture of surfactants is what makes dish soap so effective at cutting oils and grease on dishes and pots.
Dish soap generally is one of the safest of all cleaning products. If you remember a while back, dish soap was used to save thousands of birds badly soiled by ocean oil spills in Alaska and Louisiana.
Take a look below at some great cleaning ideas for your ordinary dish soap!
Take a look below at some great cleaning ideas for your ordinary dish soap!
1 - Floor Cleaner
All you need to do is mix in 1 to 2 tablespoons of dish soap in a bucket of water and mop away! Dish soap works well on linoleum and vinyl floors, as well as ceramic tile. But do not use on wood flooring, as they may stain or warp. For laminate flooring, follow the manufacturer’s recommendation for cleaning.
2 - Laundry Cleaner
Some of the most difficult stains to remove from fabric are the oil-based stains. But dish soap is a great stain remover! Gently rub the soap into the fabric with the hottest water that is safe for your fabric.
For hand-washable clothing items, dish soap is great to use! Make a solution using 1 Tablespoon of dish soap and 1 gallon of water and soak the fabric for about a minute, rinse in clear, clean, cool water afterward.
3 - Countertops and Other Surface Cleaner
Mild dish soap works very well on your countertop surface. It also works well on your baseboards, window sills, and many other surfaces. One way you can easily apply it is to add a little soap to a spray bottle filled with warm water. Spray the surface and wipe clean. Rinse with a damp cloth and dry the surface.
4 - Appliances Cleaner
Your appliances can get pretty filthy, pretty fast! There are a lot of appliances included in this category that can benefit from a dish soap cleaning. These include microwaves, toasters, blenders, griddles, ovens, cooktops, refrigerators, and more… oh, let’s not forget your washer and dryer as well! A good way to clean them is with a spray bottle or a bucket of water. Whichever works best for you. Make sure you rinse appliances after washing by wiping them with a damp cloth and then drying thoroughly.
5 - Glass Cleaner
If you dilute your dish soap with water, it can be a great cleaner for glass. This is best for really dirty glass surfaces to clean off the dried-on dirt and grime. Afterward, shine it up with a glass cleaner. If using a squeegee, you may not need to use a glass cleaner.
6 - Kitchen Cabinet Degreaser
You don’t realize how much dirt and oil accumulate on your cabinets if they aren’t cleaned regularly. The oils are mixed with dust and kitchen grime and create a thick layer of sticky grit! Your best defense in keeping up with this mess is wiping them down with a mixture of 2 Tablespoons of dish soap and warm water solution for scrubbing. The special mixture of surfactants that lifts the grease from your dishes will do the same for the grease on your cabinets.
7 - Outdoor Furniture and Grill Cleaner
Your outdoor furniture needs a good cleaning too! Especially after the winter when you bring your furniture out from storage, or you get a good coating of tree or grass pollen covering everything. Mix up a small amount of dish soap in a bowl of warm water and wipe down the plastic or metal furniture. After wiping it down, lightly scrub it with a non-scratch nylon pad, rinse the furniture with a garden hose. This works well on plastic and metal, but do not clean teak or other wood furniture with dish soap.
Your Barbecue Grill’s walls and burner grates need to be cleaned regularly. A strong mixture of dish soap and warm water solution works great for cleaning up grease and residue. Be sure to rinse thoroughly before using the grill again.
Oil and Antifreeze stains on a garage floor or driveway can be cleaned up by covering the stain with baking soda, then pouring undiluted dish soap over it. Scrub the stain with a plastic brush, then let it sit for several hours. Scrub the stain as necessary, repeat until the stain is gone. May take a few times.
7 - Jewelry Cleaner
Mix a very small amount of dish soap with seltzer water in a bowl, then soak your dirty jewelry piece in the solution for 5 minutes. Slosh it around to make sure you get the dirt off the piece. Using a soft toothbrush can help get the dirt off.
8 - Personal Grooming
If you are needing something universal for cleaning, say for a camping trip, dish soap can be a good source. It is mild enough to be a substitute for shampoo or body soap.
9 - Carpet Stains
A lot of stains can be removed from your carpet with a solution of 1 Tablespoon of dish soap and 2 cups of warm water. Just sponge the stain with a little bit of the solution until the stain is removed. Then rinse by sponging the spot with cold water. Then pat dry with a cloth.
10 - Get Rid of Pests Harming your Plants
Mix dish soap and water in a spray bottle. Lightly spray it over your plants infested with pests. It won’t harm the plants, but it will kill the insects plaguing them.
]]>
https://gianigranite.com/blogs/giani-101-blog/marble-countertops-for-under-2002020-07-14T11:37:00-05:002020-07-14T12:00:35-05:00Marble Countertops For Under $200 by Taren TootenAmy GeorgeMore]]>
Hello, everyone! I’m so excited to introduce our guest blogger Taren Tooten! Taren has a passion for website design, digital content management, and social media. Click here to learn even more about Taren!
...And check out her tutorial below on how to paint your countertops to look like Marble for under $200!
Marble Countertops For Under $200
In November I decided to give my kitchen a little update. About two years ago my realtor told me about a countertop paint kit she used and loved. When I was ready to update my kitchen I thought about the paint kit again and fell in LOVE with the Giani Marble Countertop Paint Kit, both the outcome and the price.
This paint kit gave my kitchen a total facelift for under $200! Just like that, I had a solution that wasn’t super expensive and gave me the look of brand new countertops. I had a Saturday off and started the process on a Friday night, and by Sunday, I had brand new countertops!
Before my countertops were pretty boring, they were the default cream color from when my condo was built. The paint kit had step by step instructions, as well as a tutorial video that was very helpful and easy to follow. I’ve outlined the process below.
Countertop Kit and Contents
In the images below, I outline the steps from start to finish.
I cleaned the countertops with a Brillo pad and warm cloth. After fully drying the surface, I taped the trim.
At this step, I added two coats of the white base primer to cover the original countertop color.
I LOVED the creativity of this step! It let me put my own touch on the design. The veining process was created with a small brush to paint the vein, then spraying water for the marble look.
After the veining, I applied the epoxy topcoat which gave it the shine and finished look.
I was blown away with the outcome of my countertops! I can’t believe how amazing they turned out and for under $200!! Purchasing granite countertops and labor would have cost me so much more.
My after photos look a little different than the before, since updating my countertops, I swapped out my hardware from gold to brushed nickel, DIY’ed backsplash, and painted! I’m so in love with the updates to my kitchen, and highly recommend the countertop paint kit if you’re considering updating your countertops and looking to save a few bucks.
]]>
https://gianigranite.com/blogs/giani-101-blog/giani-5-essential-paint-tips2020-07-13T13:42:00-05:002020-07-14T09:18:19-05:00Giani's 5 Essential Paint TipsAmy GeorgeMore]]>
Know When to Prime Your Cabinets
Even though our cabinet paints are paint and primer in one. There are some circumstances where priming necessary.
Paper-covered cabinets or cabinets that have the ends covered in wood paper, you will need to prime the sections covered in paper. A single coat of Zinsser's oil-based, white Cover Stain Primer Bond is necessary to properly prep papered surfaces before painting with Nuvo.
Raw Wood (such as plywood and cabinets that have not been sealed) should be primed to prevent possible Tannins bleeding through. We recommend using a stain blocking, oil-based primer before applying Nuvo Cabinet Paint.
For Consistent Color
The "same" color of paint can vary between cans. That difference can be glaringly obvious if you pop open a new can halfway through a project. To ensure color consistency from start to finish, blend the same paint color from different cans into a single batch in a larger container to ensure a consistent color mix. Mix well. What you don’t use, you can pour back into one of your empty cans for future use.
Clean, Clean, Clean with a Degreaser
Paint won't bond to greasy or filthy surfaces, like kitchen counters near a stove, or the areas around cabinet pulls that are constantly touched with dirty hands. It is essential to clean your cabinets or countertops with a degreaser to ensure that no grease or residue has been left behind. Note: Be sure to read the label and follow directions of the degreaser—this stuff is potent. Rubber gloves and eye protection are required.
Make Sure the Area You are Painting is Well Lit
If you want to achieve consistent color on your cabinets or countertops, make sure you have sufficient lighting, maybe even using a work light as you go along. Pay close attention to the edges where you use a brush instead of a roller. There might be more inconsistencies in these areas.
Choose Your Color Wisely
When choosing the color you want to paint your cabinets or countertops, take note of the color’s undertone and take into consideration that lighting, natural light, wall color, and surrounding decor will affect the final color outcome. For example, some whites may have a warmer undertone and if painted next to a cool white, the yellow may stand out or the cool white with the cooler undertone may appear to have a bluish tint.
]]>
https://gianigranite.com/blogs/giani-101-blog/removing-paint-stains-from-any-surface2020-06-18T11:07:00-05:002020-06-18T11:13:59-05:00Guest Blog with Erin Austin: Removing Paint Stains from Surfaces in your HomeAmy GeorgeMore]]>
How to Remove Paint Stains From Any Surface in Your House
From time to time, everyone likes to freshen up their homes with a new coat of paint. And while that’s all well and good — we can accidentally spill this paint on surfaces that aren’t easy to clean. Sure, even as careful as you are — a tiny smudge is bound to get somewhere.
You’ll find that even professional painters get some paint on carpeting or countertops. This is a situation that can be frustrating, especially after you’ve spent countless hours painting a surface. With that in mind, we’re here with a nifty guide to show you how to remove stains from any surface found in your home!
Stains on Glass
Adequately protecting your windows while painting is certainly difficult. On one hand, you want to cover up your glass panels so that no splatter comes in contact with them; but you also need to take care not to damage them. That’s why some paint is bound to find its way onto your windows.
Cleaning paint that’s hardened on a glass surface is difficult without damaging the glass itself. However, a simple home remedy will help you in this regard. You just need to take some dish soap and look for a razor blade. This combination will help you remove even the most ancient paint stains on glass.
Just make a solution of warm water and soap, and cover the spotted area on the window using a rag or a sponge. Then, carefully position the blade of your razor at 45 degrees. This position will allow you to clean the paint off the now-damp glass without damaging it.
Cleaning Countertops
Paint is certainly great for freshening up the kitchen space with bright new colors. Still, some paint is bound to end up on your valuable kitchen countertops. In that situation, you need to carefully clean them while avoiding any damage to the texture. Proceed with extreme caution, and use something you’ve already got in your kitchen.
For instance, you’ll find that olive oil is a great remedy for paint stains on a countertop. Use a very thin coating of the oil on the area where you spilled some paint, and slowly rub it in using any kind of dry rag. It won’t appear to work at first, but just be patient and continue with the circular motions until the spot is gone.
Unfortunately, you may find that even consistent rubbing does not help. In that scenario, take a putty knife (preferably a plastic one) and wrap it in an oily rag. Proceed to slowly scrape the paint off the surface, and don’t put too much pressure even with a plastic knife. In the end, the paint drops should be all but gone; all that’s left is to wipe oil residue with a dry cloth.
Or.... if the paint spill is too much to clean, you can always sand the paint down, clean the countertops off and paint them with Giani Countertop Paint Kits! This is a great remedy to hide a big paint stain..... just paint it! ;)
Dealing With Carpet Stains
Surfaces like kitchen tops and glass can be tough to clean once you spill some paint — but we all know that kind of stain isn’t permanent. However, a much bigger problem is finding that you’ve spilled some paint on your floor carpeting. If you want to remove paint from carpeting, you need to act quickly and know what you’re doing.
The first thing you should do is wipe up the paint before it dries on the carpet. Try taking a couple of dry towels and blotting the spilled spot, being careful not to rub it in, as you’ll just make the stain bigger and more difficult to clean. If you happen to have any glycerin laying around, put a little on the towels and try to loosen any hardened paint.
If you’ve noticed this stain too late and the paint has already hardened, you may need to use an alcohol solvent, like a nail polish remover to remove the stain. Alternatively, white vinegar mixed with water will also do the trick. There are commercial paint cleaners, of course — but these can be incredibly strong chemicals that end up doing more harm than good.
Tile Stains
People often get paint on vinyl floors or linoleum surfaces. Cleaning these thoroughly without causing damage can be tricky. This is another situation where a soap solvent would be the best idea. Try soap and water first. If any hardened residue remains, you’ll have to scrape it off. Still, we recommend foregoing a metal scraper for a plastic one, as the latter is less likely to damage the surface you’re attempting to clean.
There are stains that may seem to require rubbing alcohol, but be careful not to overuse these. A combination of excessive rubbing and alcohol solvents may cause damage to the tile’s finish.
Cleaning Paint From Wooden Surfaces
If you spilled some latex paint on a wooden floor, you probably already know just how difficult the cleanup will be. Removing the stain without leaving a trace on the wood is nigh impossible. However, some alcohol and a wool cloth will help you — in combination with a huge amount of patience.
If your paint is oil-based, then you’ll need to get some mineral spirits to remove them from the wooden floor or surface. Still, you need to take care not to let the wood soak up a lot of these spirits; it will rot more easily in the long run.
Once you’re finished cleaning up, use some distilled water to gather any remaining residue off the surface. If you notice the wood losing color on the spot where you removed the paint, don’t worry— you can get finish repair pens that give your wood the touch-up it needs. Just find the right shade that matches your wooden surface area.
AND THAT'S A WRAP! We hope this guide was helpful to you and that you feel more confident about how to handle removing paint stains. Stay safe and have a good one, guys!
]]>
https://gianigranite.com/blogs/giani-101-blog/how-to-make-your-small-kitchen-feel-bigger-on-a-budget2020-05-19T15:08:00-05:002020-05-19T15:45:34-05:00Guest Blog with Archie Adams: How to Make your Small Kitchen Feel Bigger on a BudgetAmy GeorgeMore]]>
Budget-Saving Tips on Remodeling a Small Kitchen to Make it Feel Bigger
Are you looking around your kitchen and thinking some changes are long overdue? But then you start wondering how much a kitchen remodel would cost and give up on the idea? If you continue reading, you will realize there is no reason to despair!
We are here to tell you that there are plenty of things you can do for a small kitchen remodel without spending a fortune. We are going to share some tips on how to remodel a kitchen that we hope you find useful.
How Much Does it Cost to Remodel a Kitchen? When you have a small kitchen, and you want to make it feel bigger, one of the main questions you probably have is the cost involved. Here are some suggestions on how you can do it without putting a strain on your budget.
Painting the Walls Changing the color of the walls in your kitchen won’t cost you a lot and requires little effort, but yet it makes a huge difference. It is a generally known fact that light colors make a room look bigger and brighter. Light and bright walls are more reflective, making a space feel open and airy, which helps maximize the effect created by natural light. Dark colors, on the other hand, tend to absorb light, making a room look smaller.
Smaller Appliances Large appliances on a small countertop can make your small kitchen look even smaller. When shopping around, you will see that many appliances and gadgets come in different sizes. Having a small kitchen doesn't mean you cannot have what you want or need. There are plenty of highly functional appliances that fit small cooking spaces. If at all possible, try keeping the smaller countertop appliances in the cabinet instead of on the countertop to eliminate clutter.
Change Out the Lighting Add more lighting to your space. Often when there is poor lighting, it will make your space look even smaller. There are plenty of options for LED lighting that can be placed under your upper cabinets for accent lighting and also great for under your floor cabinets. Recessed lighting is also a great choice to light up your kitchen space.
Paint your Cabinets Buying new cabinets can be expensive, but it's not absolutely necessary. You would be surprised how a little paint can completely transform the appearance. If you are happy with the cabinets in general and they are in good shape, you can simply apply a couple coats of paint to your cabinets in a different color. To get the look in the picture, try Nuvo Titanium Infusion Cabinet Paint.
Conclusion Worrying about the cost to remodel a kitchen should not stop you from doing it. As you can see, there are many things that you can do to your kitchen even if you are on a budget. What we listed for you here today are small and simple steps for a kitchen remodel, but in general, there are many more ideas out there. Do you have some of your own suggestions on how to make your kitchen bigger than what it is?
About the Author
Archie was a builder for more than 40 years. Mainly after his retirement the enthusiastic electrical works in his garden and writes for a blog homemakerguide.com to keep himself occupied. His many years of experience can get you the right tool reviews whether it is a drill, welding machine or so. An impressive fact to note about him is that almost everything in his house is a representation of his skills made by his hands.
]]>
https://gianigranite.com/blogs/giani-101-blog/how-to-make-your-home-feel-cozy2020-04-29T14:15:00-05:002020-04-29T15:12:24-05:006 Ways to Make Your Home Feel CozyAmy GeorgeMore]]>
We all want the feel of a cozy home — the feel of a home that is lived in and loved. With a little warm lighting, fresh flowers, and upcycling your outdated furniture, you can create the ultimate cozy living vibe.
Fresh Flowers
Fresh flowers are always a beautiful touch. They can add instant charm to your space and help a house feel more lived in.
Invest in a few decorative vases and jars and make your arrangements to place on countertops, coffee tables, and dressers throughout your home.
It may seem like a splurge, but fresh flowers can last quite a long time if you’re diligent about changing the water and trimming the stems.
Inviting Scents
Nothing creates a cozy atmosphere quite like a scented candle. It can transform a room into a cozy, warm space instantly. Candles arranged throughout the home can add beautiful light and ambiance to any room.
Warm Lighting
Indirect lighting is a good way to set a mood. It might be used inside a bookshelf, above cabinets, as toe-kick lighting in a kitchen, or around a cove ceiling if your home has that sort of architectural detail. Replace any cool bulbs with warm bulbs that are under 2,700k (Kelvin). This is why candlelight is so cozy – the color temperature of a candle is about 1850k – a very warm light!
Upcycle Old Furnishings
A little imagination and a bit of DIY spirit can go a long way when you’re looking to add a personal touch to your space. A coat of paint can turn empty wine bottles into flower vases, pallets can be turned into all kinds of adorable—and useful—household items. Chalk painting kitchen tables, accent tables, or even outdated picture frames with Chalkworthy Chalk Paint are just a few more ideas. The possibilities are endless once you start getting creative.
Backyard String Lights
You can get creative with string lights. There are several ways to decorate your outdoor living space with lights. One of the most common ways is to string them over a patio or deck.
If you have a balcony, you can hang the lights along the balcony wall, or string them up around the ceiling of your balcony.
You can also create accent lighting by adding string lights inside of a lantern or you can string lights around the perimeter of your outdoor umbrella. For an extra pretty effect, line the inside of the umbrella by following the lines of the umbrella seams.
Use appealing textures
You can make any space feel more comfortable by incorporating textured items that invite you to touch them, like a fluffy area rug in your living room, smooth wooden pieces, patterned, or faux fur accent pillows and other cozy items.
]]>
https://gianigranite.com/blogs/giani-101-blog/colorful-cabinet-ideas-to-update-your-kitchen2020-04-22T09:52:00-05:002020-04-29T14:34:40-05:00Guest Blog with Rebecca Rogers: Colorful Cabinet Ideas To Update Your KitchenAmy GeorgeMore]]>
Colorful Cabinet Ideas To Update Your Kitchen
With the first spring of the new decade underway, many homeowners are looking to update and upgrade their kitchens. One of the easiest and most affordable ways to get started on your future kitchen overhaul is to repaint your cabinets and switch out hardware. But how do you pick out the right color for your kitchen cabinets? Which colors are going to be timeless classics, and which are just a passing fad?
If you’re not sure where to start with your color choices for your kitchen cabinets, here are a few popular color options that are more likely to stand the test of time.
Classic Neutrals
No matter when you last updated your kitchen or what your preferred aesthetic is, chances are there’s at least one neutral tone paint option out there that will work with your kitchen. Neutral tones like grey, beige, or the modern combination of the two, “greige,” can compliment a variety of design styles. Whether you’re going for vintage, retro, or minimalist, a neutral paint color is a fairly safe choice. Look for color names like Coco Couture, Hearthstone, or Driftwood for a neutral palette to add to your kitchen.
Brilliant Whites
Bright white cabinets can sometimes be intimidating for homeowners, but they can really make your kitchen look light and open. If you’re wanting a clean and modern aesthetic, white cabinets are a top choice. They’re also great for smaller spaces, since the light color can make your kitchen feel larger. Look for color names like Titanium Infusion or similar bright whites to complete this look.
Bright Accents
For those who want something a bit outside the norm, using bright colors on your kitchen cabinets can be a great way to add some visual intrigue to your home and kitchen. While not for everyone, a bright accent color on your kitchen cabinets can dramatically shift the appearance of your kitchen without investing in a full renovation or overhaul. Bright accents can be just about any color you can think of, but some names to look for include Celadon Cove, Oxford Blue, and Tidal Haze.
Dramatic Dark Tones
Finally, a classic and dramatic look can include painting your cabinets in darker shades. While they don’t necessarily have to be black, black is a popular and timeless option. More modern variations on this look include dark greys and even deep jewel tones. Just make sure to avoid this option in smaller kitchens, as they can darken the space. That being said, this is a great option to give your kitchen an extra bit of extravagance and luxury. Look for color names like Black Deco or Earl Grey for a darker cabinet.
Trendy Or Timeless? How To Choose
Not all kitchen cabinet colors are created equal, especially when it comes to how long the look will last without feeling dated. Generally, neutral colors, whites, and blacks are better for a look that will last a long time. On the other hand, more colorful options can create a bold visual impact, but may need more updating to stay on trend. At the end of the day, the best kitchen cabinet color option will depend on your style and personal tastes.
]]>
https://gianigranite.com/blogs/giani-101-blog/diy-social-distancing-paint-projects2020-04-16T10:49:00-05:002020-04-16T11:45:12-05:00DIY "Social Distancing" Paint ProjectsAmy GeorgeMore]]>
DIY Social Distancing Paint Projects So many of us are working from home these days. Some aren’t working at all, and have some free time to catch up on things they didn’t have time to do before. What is on your list? Are you googling DIY projects nonstop til you find one that looks “easy enough”? One that won’t break the bank? Have you ever wanted to update a space in your home, but don’t exactly have it in the budget? Keep reading, I think I have something for you!
Below are a few great ways to update your home on a budget.
................................
Giani Countertop Paint
Transform your countertops and get the kitchen you’ve dreamed of without the mess, time or cost of replacement. From dull and dated to dynamic and elegant, Giani Marble Kit will help you paint your countertops to look like marbled quartz and upgrade your home in just one weekend.
Giani Countertop Paint is a simple, three-step application that will transform Formica®, laminate, Corian®, ceramic tile, butcher block, cultured marble, and traditional granite in a single weekend. Each kit contains all necessary tools and covers 35 square feet of surface, which is the average amount of countertop area in a kitchen.
Giani Countertop Paint is safe for interior use, very low odor, and zero VOC. The specialized primer hides existing discoloration, burns, stains, and minor scratches, while the mineral colors create the characteristics of marbled quartz. Each kit comes with an ultra-durable, high-gloss, non-yellowing Epoxy Resin Topcoat that finishes and protects the application against the everyday use of your countertops.
................................
Nuvo Cabinet Paint Don’t just live with your outdated cabinets, love them! Nuvo is a DIY makeover process that will transform existing cabinets without the mess, time and cost of replacement. From unsightly and unfashionable to refreshed and renewed, Nuvo will help you paint your cabinets and upgrade your kitchen or bath in a single day.
Nuvo is a simple, brush and roll-on application that will transform most wood, laminate and metal cabinets in two easy coats, and dries in a soft, satin finish. Each kit contains all necessary tools and covers 100 square feet, which is the typical amount of surface area of most kitchen cabinets.
Nuvo Cabinet Paint is water-based, safe, low-odor and low in VOC. The specialized paint and primer in one system covers most existing finishes with minimal prep, and without the need to dismantle your cabinets. Nuvo’s durable design is water resistant and withstands the wear and tear of everyday use without additional topcoats or sealers.
................................
Brick Transformations Lighten up that special space in your home and makeover your traditional fireplace or exposed brick features with Giani Brick Transformations Whitewashed Kit.
Whitewashed compliments any decor and requires little prep to get started. Ideal for fireplaces, brick walls, and interior accents, the kit contains everything you need to whitewash a range of brick colors. Brick Transformations’ densely pigmented formula is specially crafted for the unique characteristics of brick and easily absorbs, creating a durable and lasting color. Brick Transformations takes away the guesswork with paint and water mixture ratios and puts all of the right tools in your hands. Transform your fireplace or brick accent into the centerpiece it was meant to be in a single morning or afternoon.
..........................
Just a few ideas to update that brick you have been wanting to change forever or revamp that kitchen or bathroom space to something more appealing to you.
For more project ideas, check out more of our blog posts.
]]>
https://gianigranite.com/blogs/giani-101-blog/how-to-make-planter-posts-for-string-lights2020-04-01T13:42:00-05:002020-04-01T14:20:09-05:00How to Make Planter Posts for String LightsAmy George
Enjoy your night with wood barrels made into planters, and posts that hold your string lights. Really adds to the look, feel and character of your back porch or deck. Who doesn't love nice outdoor lighting?
]]>
Right now, with all that is going on in the world, we are able to enjoy every aspect of our home whether we want to or not. However, getting a little fresh air is a must when you're cooped up inside tutoring your children or working virtually from your in-home office all day.
I found a block post on the DIY Network page on how to install string lights using wood barrels, concrete and posts and I thought, what a fantastic DIY project to do to your porch or deck, especially right now while a lot of us have time at home.
Here is what you need:
Tools and Materials
planter barrels
4x4 post
(4) bags Quikrete
water
shovel
C-hooks
string lights
flowers
potting mix
hand trowel
scrap wood
pneumatic nail gun
nails
air compressor
level
drill
drill bit
zip ties
You can find these items at your local hardware store.
Step 1: Mix Concrete in Barrel
The concrete should fill about ½ to ¾ of the barrel to provide enough stability for the posts. Set a planter barrel in place and mix the concrete in the barrel. We filled the barrel with about 8”-10” of concrete to a make a 16”-18” planter.
Mix the concrete with water and shake the planter to ensure air bubbles in the mix rise to the top. If you are using several bags of concrete, it is easier to mix one at a time.
Step 2: Insert Post
Set the 4x4 post in the center of the planter and check the level to make sure the post is not leaning.
Step 3: Support Post
Screw scrap wood to the post to hold it upright while the concrete is setting. Add another bag of concrete if necessary.
Step 4: Add Drainage Holes to Planter
Use a drill to make drainage holes just above the line of concrete.
Step 5: Fill With Soil and Plants
After the concrete has cured, add a layer of pebbles to help with drainage. Then fill the barrel with potting mix and selected flowers.
Step 6: Add Hooks
At the top of the 4x4 post, pre-drill a hole for the C-hook that will hold the string lights. Insert a C-hook in each of the poles toward the top. Hang string lights from the C-hooks using zip ties to secure the lights to the hooks. Hang the lights around the perimeter of the space, crisscrossing the area if desired.
For a change in color, try painting your wood barrels. Giani Chalkworthy Antiquing Paint offers a variety of colors to choose from. For more information visit Chalkworthy Antiquing Paint.
]]>
https://gianigranite.com/blogs/giani-101-blog/guest-blog-with-lisa-hall-3-ways-giani-products-transformed-my-kitchen2020-03-17T15:45:00-05:002020-03-17T15:45:57-05:00Guest Blog with Lisa Hall: 3 Ways Giani Products Transformed My KitchenAmy George
Greetings fellow DIY-ers! I’m Lisa, a DIY home improvement enthusiast and owner of what probably should have been a “tear down” house. Over the past eight years, I have been going room by room fixing up the house, doing much of the work myself on a very tight budget.
When it came to the kitchen, I was especially overwhelmed as everything I read online listed even a low-end kitchen renovation starting at $15,000 - $20,000. I had no idea how I was going to make the MANY needed improvements. And then I discovered Giani!
In a large part due to Giani products, I was able to update my kitchen for a fraction of the cost and transformed this…
…into this.
And I did it all for under $3,500. Here’s how Giani saved me thousands of dollars on three key areas of the kitchen.
1) Like-New Appliances with Stainless Steel Paint
While all functioning, my kitchen appliances were old and mismatched. I had a yellow refrigerator, white oven/stove, yellow hood and (somewhat tired looking) stainless steel dishwasher. I was planning on slowly updating the appliances over time, beginning with the refrigerator, and bought a stainless steel fridge at an appliance store. As I was checking out, I mentioned to the sales woman that while all my appliances functioned they were mismatched. She then asked, “Have you heard of stainless steel paint?” No, I hadn’t but was thrilled to learn about it!
I went home and immediately searched for it online, and up popped Giani. Not only did I instantly order the liquid stainless steel paint, I was even more thrilled to discover they also have cabinet and countertop paints.
The Giani stainless steel paint is incredibly easy to apply and has proven very durable over the past three years. I used it on my oven/stove, hood and dishwasher – and now have a full set of matching appliances, for a fraction of the cost!
2) Low-Cost Countertop Transformation
My next project was to tackle the countertops. I knew that getting new countertops would be prohibitively expensive and was so relieved to learn about Giani’s faux granite countertop paint!
While my old white laminate countertops looked dreadfully outdated, they were in good condition and a paint job gave them new life. Once I got a hang of the sponging technique used to make the “granite look,” it was fun to experiment with the color combinations to get just the right look (add a little more black for a darker look, or pop in more white to brighten it up).
While you may wonder if paint will hold up on a high-use area like I countertop, rest assured mine certainly has. Over the past three years, I’ve only had to do a couple touch ups on the countertop edges, which is quick and easy to do.
3) Refreshed New Look for Old Cabinets
Another big ticket item that can hurt the wallet is new cabinets. My cabinet boxes were in good condition but the doors were not the style I wanted in my new kitchen. So I replaced the doors and hardware, and painted the cabinets with Giani NUVO cabinet paint. I have been very happy with the quality of the paint. It hasn’t chipped or peeled. And even though the paint is white - dirt, stains and marks are easily removed to keep them looking like new.
Appliances, countertops and cabinets tend to be the most expensive elements to update in a kitchen and Giani products saved me thousands of dollars! I passionately believe that everyone can have a home they love, no matter what your budget. And products such as Giani can help you transform your space from “ugh” to “love” without breaking the bank.
Want more tips on how to transform your kitchen? Watch my “Budget Kitchen Updates” how-to video on Skillshare. Not a member? Sign up here for 2 free months.
]]>
https://gianigranite.com/blogs/giani-101-blog/kitchens-are-the-soul-of-the-home-so-inspired-design-is-a-must2020-03-05T08:44:00-06:002020-03-05T08:44:56-06:00Kitchens Are the Soul of the Home, so Inspired Design Is a MustAmy Georgestudy from Point2 Homes shows just that. After analyzing 1.2 million listings across the U.S. containing 65 million words to see which are the words that agents use the most, the kitchen came on top. “Granite countertops” and “stainless steel appliances” are the first and the third most popular keywords or amenities in home descriptions all over the country.
]]>
The ideal home means more than perfect location, modern amenities, and updated bathrooms. And transforming a house into a home is a hundred little things, from finding the best floorplan for your needs and deciding on the number of bedrooms to choosing the living room rug and the kitchen tile.
And talking about kitchens, this room receives a lot of attention both from prospective homebuyers and from real estate agents, who know that home descriptions must include many details about the room that’s considered the hub of the home.
The most recent study from Point2 Homes shows just that. After analyzing 1.2 million listings across the U.S. containing 65 million words to see which are the words that agents use the most, the kitchen came on top. “Granite countertops” and “stainless steel appliances” are the first and the third most popular keywords or amenities in home descriptions all over the country.
According to the study, “no matter the price range or the region, the three absolute winners are “granite countertops,” “hardwood floors” and “stainless steel appliances,” signaling buyers’ preference for both practical and beautiful listing details.”
Homebuyers are looking for beautiful, upgraded kitchens no matter the price range. “Updated kitchen,” “new kitchen,” and “custom cabinetry” are some of the keywords that appear in almost all price categories. “Granite countertops” and “stainless steel appliances” or “new appliances” reign supreme, but many homes for sale also boast “quartz countertops” and “large kitchen islands.” According to the study, “an increase in buyers’ expectations, coupled with a generalized upgrade in amenities to meet those expectations” has led to the majority of listing descriptions mentioning these details.
So whether you are a homebuyer, a home seller, or a homeowner just looking to breathe new life into the kitchen and make it stand out, you have a lot of options. But few are as easy to use and as affordable as the paint kits from Giani Granite. Giani’s selection of countertop paints, for example, includes options for granite, quartz, butcher block, and marble styles.
Given that new trends are all about accenting certain elements or bringing into focus a kitchen appliance or item, these paints will make it extremely easy to freshen up your kitchen’s look. As Samantha Johnson, senior editor and communications specialist at Superior Stone & Cabinet stated, “the latest buzz is about using countertop paint to turn an isolated portion of your countertops—such as the counters on an island—into a butcher block while using a granite, quartz, or marble look for the rest of the kitchen. This acts as the countertop equivalent to a painted accent wall, drawing the eye toward a spectacular centerpiece that stands out from the rest.”
Sometimes, even the smallest renovation project, done right, will completely change the look and feel of the room that is considered the soul of the home. A stylish marble countertop, or maybe a new sink or cabinets painted with Chalkworthy Antiquing Paint might just be the easy design improvement your kitchen needs.
]]>
https://gianigranite.com/blogs/giani-101-blog/6-reasons-to-add-a-coat-of-paint-to-your-home2020-03-03T09:51:00-06:002020-03-03T12:08:52-06:006 Reasons to Add a Coat of Paint to your HomeAmy GeorgeMore]]>
Most homeowners agree that one easy way to refresh a home is to paint a few rooms or the entire property. Painting produces an immediate change, whether it’s just the walls of your home or the cabinets and countertops!
1. Cleanliness A fresh coat of paint on the walls tends to make a home look cleaner which can be a big motivating factor if you’ve been trying to keep your house clean. New paint will also help to cover up your old dirty walls and baseboards and if you are a DIY kind of person, it’s rather inexpensive.
2. Protect your walls Life happens, and sadly the walls on the inside of our home can get worn. When permanent stains or marks are difficult to remove, painting the house inside and out will help to hide these defects.
3. Easy & Affordable A new coat of paint is by far the easiest and most affordable way for you to achieve the change you are looking for in your home.
A fresh coat of paint can help to increase your home’s value. So if you are thinking of selling your home, this can likely help, as it will have a clean, fresh look, which is very appealing to the buyers.
4. Painting is fun If you haven’t painted before, you should give it a try. Painting with a friend or loved one can be a lot of fun. It’s a great way to spend time together and you are working together to make your home look and feel better!
5. Love your “new” room A fresh coat of paint can give you a whole new outlook on your home, which can have an impact on your life. Lighter colors tend to open up a room, pastels can be calming, and bold colors can help you with making a statement.
6. Other ways to freshen up your home Not only will painting your interior walls freshen and clean things up, but painting your cabinets and/or countertop can make your living space look like an entirely new room! One of the best things about painting your countertops or cabinets is how much money you will save not replacing them which can be very pricey.
]]>
https://gianigranite.com/blogs/giani-101-blog/what-are-the-latest-trends-in-painting-kitchen-countertops-and-cabinets2020-01-02T13:21:00-06:002020-01-02T13:30:24-06:00What are the latest trends in painting kitchen countertops and cabinets?Brenna Foley
For many homeowners, the most daunting part of starting a kitchen remodel is the upfront cost. Replacing countertops and cabinets can be expensive, and the larger your kitchen is, the higher your costs will be. This is why many are taking a serious look at painting their existing countertops and cabinets.
]]>
For many homeowners, the most daunting part of starting a kitchen remodel is the upfront cost. Replacing countertops and cabinets can be expensive, and the larger your kitchen is, the higher your costs will be. This is why many are taking a serious look at painting their existing countertops and cabinets. With high-quality countertop and cabinet paint, homeowners can transform their kitchen for a fraction of the cost of installing new material.
In this article, we’ll review some of the benefits of using paint on your cabinets and countertops, as well as the latest design trends you should consider before starting your project.
Save money by painting, not replacing, your cabinets
In a vast majority of cases, most cabinets are visually outdated, not physically outdated. This means that while the aesthetic of the cabinet has long since gone out of style, the actual wood of the doors and cabinet boxes is in good shape. These are the ideal circumstances for painting the cabinets instead of refacing or replacing them altogether.
One of the obvious benefits of painting kitchen cabinets is the cost savings. Brand-new cabinets are expensive, and outfitting a kitchen with them—especially when installation costs are taken into account—can run in the tens of thousands of dollars. In contrast, a high-quality DIY painting kit such as the Giani Nuvo series costs less than $70 and includes everything you need to complete the project. Painting cabinets using this kit is also a major time-saver: the brush and roll-on application of the Nuvo series means that most homeowners can complete the project in about a day.
If you’re looking for a new look for your kitchen cabinets but want to limit your upfront costs, be sure to consider purchasing a cabinet paint kit.
What are the latest color trends?
Many homeowners are embracing the simplicity of minimalism by repainting their cabinets, countertops, and walls with neutral colors that are timeless, yet modern. Light and dark grey cabinets are especially popular. Paired with a white subway tile backsplash and white countertops, they provide adequate contrast that allows different features of the kitchen to shine. If this is the look you’re going for, we recommend looking at the Giani Nuvo Earl Grey cabinet paint kit.
Make your dream kitchen a reality with the right countertop paint
This is one of the latest trends in kitchen remodeling, and for good reason: painting your countertops is an inexpensive and easy way to get all the look of stone and butcher block countertops without the mess and hassle. Countertop paint can be applied to pre-existing Formica or laminate counters, which means you don’t need to pay a high price for new granite, quartz, or marble countertops.
Giani’s lineup of countertop paints includes options for granite, quartz, butcher block, and marble styles. Their complete kitchen kits cost under $100, which makes them a much more affordable option than stone that may cost that much per-square-foot.
What are the latest countertop trends?
The latest buzz is about using countertop paint to turn an isolated portion of your countertops—such as the counters on an island—into a butcher block while using a granite, quartz, or marble look for the rest of the kitchen. This acts as the countertop equivalent to a painted accent wall, drawing the eye toward a spectacular centerpiece that stands out from the rest.
As mentioned earlier, many homeowners are pairing dark grey or charcoal cabinets with white or off-white countertops. The Giani Marble and White Diamond countertop paint kits are perfect if you’re looking for that particular aesthetic.
Take the next step toward refreshing your home’s style
If you’re ready to update the look of your kitchen, get started by talking with a design expert in your area about your options. For homeowners looking to get a great-looking kitchen for less, painting your cabinets and countertops may be the right way to go.
Written by Samantha Jonhnson, senior editor and communications specialist at Superior Stone & Cabinet , the go-to source for custom and wholesale countertops & cabinets in sunny Phoenix, AZ. When not in the office, Samantha really enjoys gourmet cooking and traveling with her pup. She is also an avid reader.
]]>
https://gianigranite.com/blogs/giani-101-blog/ana-ochoa2019-10-23T09:05:00-05:002019-10-23T09:08:59-05:00Guest Bath Makeover with Ana Ochoa and Nuvo Cabinet PaintJamie RichterMore]]>
Hello, everyone! I’m so excited for this guest blog spot with Giani! I’ll be chatting with y’all about my experience with Nuvo cabinet paint – I have now used it in both of our upstairs bathrooms, and truly LOVE the product! Giani was gracious enough to send this paint to me free of charge in exchange for my honest review! We used this paint on our master bath vanity during the Fall 2018 One Room Challenge, as well as our guest bathroom during the Spring 2019 One Room Challenge, and let me tell you, it was SO easy (WAY easier than our kitchen cabinets - I honestly wish I would have used this stuff in our kitchen, because not only is it super simple, but it looks gorgeous and has held up great)!
The best thing about Giani's cabinet paint kits (besides that they send you everything you need, including the paint brush), is that it's little to no prep. Let me say it again for the folks in the back - LITTLE TO NO PREP! Basically, for any painted surface, you lightly sand, and then clean like crazy. No trying to sand off every last bit of paint on your cabinets, etc. (Giani has instructions for other types of surfaces, so be sure to follow their instructions if working with stained or untreated wood, etc). You also don’t have to remove the doors – so amazing!
So let’s chat about how we gave our cabinets a much needed makeover, shall we? (This tutorial was completed with the Giani Nuvo Cabinet Paint Kit in Old Sage).
Here goes...
The Giani Nuvo Olde Sage Cabinet Paint Kit is available here for only $69.95. It has absolutely everything you need to makeover your cabinets...minus the tarp and tape. What a steal! We bought the Driftwood kit when we did our master bath last Fall. Read 'til the end and you'll see a pic of that space as well.
Step1: Remove any hardware you may have, and CLEAN! Before I sanded anything, I cleaned our cabinets with Simple Green – my go to cleaner. With any all-in-one paint and primer combo, you can never do too much cleaning, truly – it will make or break the application of the paint!
Step 2: Sand – you don’t have to sand off all the prior paint, just enough to scuff up the surface so your paint has something to adhere to. (As noted above, see Giani’s instructions if you are working on top of unpainted wood cabinets, especially those with lots of knots – you’ll have a few preliminary steps to take care of before getting started.)
Here you can see the results of sanding. Again – no need to get all your base paint up, just sand so the shiny surface is dulled!
Step 3: Next, you use Windex or Cinch to clean the heck out of your cabinets. This is the part you DON'T want to skimp on. Think your cabinets are clean? Nope. Clean once more just for good measure. If they aren't clean, and you paint them, you'll see cracking in the paint. I had a few spots where this happened due to not cleaning well enough – it’s hardly noticeable (Especially after the touch ups I did - see below) so not a big deal to us, but learn from my mistakes!
The spots you should focus on are the places where your hands tend to go - drawer and door tops, etc. Anywhere there might be grease from your hands, hair products, makeup, and what not, you want to spend extra time on. The cleaner, the better. Seriously.
Step 4: Tape off your counter, floors, and walls with painters or Frog tape. You want to be sure your cabinet paint gets only on your cabinets!
Step 5: Now it’s time to paint! Start by using the angled Wooster brush that Giani sends with their Nuvo Kit and paint the cabinet frames, and then tackle the fronts of the doors and then the backs with the roller. I didn’t have any drawers for this project, but I would paint the drawer fronts last if you have them, By the time I finished one coat, everything was close to dry.
I waited about 30 minutes in between coats. If you have a bigger space, you’ll likely be able to jump right into the second coat once your first one is done! Be sure to leave your doors and drawers open so they don’t dry shut!
Repeat 2-3 more times, cycling through with the frames, door fronts, backs, drawer fronts, etc. If you DO end up with a bit of cracking, as I did, you can take a small brush and touch up. HOWEVER - Giani warns that if you do touch ups, the finishes may dry differently. So touch up at your own risk! This was sort of true on mine, but I preferred the very slight difference in finish to the cracks. Touching up the spots that cracked seemed to resolve that issue for us, so I'll take no cracks over slight difference in finish! But remember, if you clean like crazy, you’ll have no issues with cracks at all, so strive for that!
Step 6: Let dry for at least 8 hours (I always wait longer - usually 1-2 days just to be safe). Use a sharp utility knife to score and remove your tape, close your cabinet doors, put your drawers back in if you have them, and you're done!
We are just thrilled with how these turned out! The last image is the AFTER of our master bath. I thought I'd throw that in for ya too. The master bath was transformed with Giani’s Nuvo Cabinet Paint Kit in Hearthstone.
And there you have it! I hope this was helpful, friends; and a HUGE thanks to Giani for letting me have some fun with their Nuvo paint kits! I wouldn’t hesitate to recommend them to anyone looking to give their cabinets and upgrade on a budget! (Please see Giani’s instructions that come with your cabinet paint kit for any other questions or concerns).
]]>
https://gianigranite.com/blogs/giani-101-blog/4-kitchen-improvement-projects-to-tackle-this-fall2019-10-21T09:29:00-05:002019-10-21T09:30:06-05:004 Kitchen Improvement Projects to Tackle this FallBrenna Foley
As the weather cools down and we leave the dog days of summer behind, many homeowners are turning their attention to long-planned home improvement projects. From a value and return-on-investment perspective, the kitchen is one of the best spaces to upgrade in your home. In this article, we’ll review several DIY kitchen improvement projects you can take on this fall, as well as what you need to get started.
]]>
As the weather cools down and we leave the dog days of summer behind, many homeowners are turning their attention to long-planned home improvement projects. From a value and return-on-investment perspective, the kitchen is one of the best spaces to upgrade in your home. In this article, we’ll review several DIY kitchen improvement projects you can take on this fall, as well as what you need to get started.
Paint your cabinets and countertops
Countertops and cabinets are the first thing most people notice in your kitchen. Not surprisingly, they have a major impact on the value of your kitchen and your home, as a whole. If you’re a homeowner who is looking to add value and visual “pop” to your kitchen, start here.
Cabinets
More and more homeowners are deciding to paint, not replace, their kitchen cabinets. There are three key reasons for this:
The cost of new, high-quality cabinets is much higher than the relatively low cost of painting them.
Painting allows homeowners to change the aesthetics of relatively new cabinets that are still in good condition.
The rise of high-quality cabinet paint, such as our Nuvo Cabinet Paint, allows homeowners to get great-looking cabinets without needing to replace them.
For kitchen cabinets that are in good shape and are just in need of a visual facelift, using a painting kit would make sense.
Counters
When most people think about remodeling their kitchen, their mind jumps to replacing the countertops. There’s actually another option: painting your counters. With a DIY paint kit such as the Giani countertop paint, you can give your existing countertops the look of natural stone at a fraction of the cost. These kits come in a wide variety of styles and colors, so there’s one for every home.
Replace your sink
The kitchen sink is a key focal point for activity in the kitchen. It’s where you wash dishes and prepare food. Despite its importance, too many homeowners are stuck with dingy, dirty sinks that originally came with the home. This is why replacing the sink—as well as its faucets and fixtures—makes sense as a kitchen improvement project ahead of the holiday season.
When it comes to selecting a new sink, think about your kitchen holistically. If you already have stainless steel appliances, a stainless steel sink is probably the right way to go. On the other hand, if it’s a match for your countertops and cabinets, a farmhouse-style sink with a front apron could be a stunning visual addition.
Aesthetics are important, but don’t forget about functionality. Make sure the sink wash basin is large enough to meet your cleaning needs. Opt for more expensive, but more versatile, faucets and fixtures—having at least one faucet with a hose attachment is a dishwashing game changer for most homeowners.
Make small changes with big impacts
Not every kitchen improvement needs to a major change. Here are some of the small, yet impactful, alterations homeowners can make to their kitchen to add value:
Adding backsplash: The right backsplash can make all the difference when it complements your countertops and cabinets. For the classic look of backsplash tile at a fraction of the cost, be sure to consider backsplash paint products such as our GIANI SUBWAY TILE KIT.
Changing out lighting: You’d be surprised at the difference that lighting makes. Swapping out bright, harsh fluorescents for cooler lights in the kitchen can make a world of difference. Pendant lighting over a kitchen island or under-cabinet lighting can also increase the utility of the kitchen while simultaneously highlighting its best features.
New paint, new space: Don’t overlook the power of paint! A fresh coat for your kitchen walls can make the space feel new and exciting. What’s more, paint is one of the least-expensive upgrades you can make to your kitchen.
Whether you’re completely remodeling or just making a few improvements, investing in your kitchen makes sense. Not only will you and your family enjoy the space in the present, but you’re also adding value to your home for the future.
Written by Samantha Jonhnson, senior editor and communications specialist at Superior Stone & Cabinet , the go-to source for custom and wholesale countertops & cabinets in sunny Phoenix, AZ. When not in the office, Samantha really enjoys gourmet cooking and traveling with her pup. She is also an avid reader. ]]>
https://gianigranite.com/blogs/giani-101-blog/6-ways-to-boost-your-curb-appeal-this-fall2019-10-08T15:25:00-05:002020-08-20T10:51:01-05:006 Ways to Boost Your Curb Appeal This FallJamie Richterimproving the curb appeal of your home. Whether you’re selling or you just want an attractive home, these tips won't cost you a fortune. Here are six ways to boost your curb appeal this fall.
Think about fall chores, and the first thing that might come to mind is raking up leaves. But the mild days are perfect for rolling up your sleeves and improving the curb appeal of your home. Whether you’re selling or you just want an attractive home, these tips won't cost you a fortune. Here are six ways to boost your curb appeal this fall.
1. Clean It Up
The exterior of your home can get pretty dirty over time, but pressure washing your home can quickly restore it to its initial look. (Always hire a professional so as not to harm any of the surfaces of your exterior.)
Not only can you restore the exterior of your home, but you can also clean up stains on your driveway as well. The pressurist shows us step by step, how you can remove years of stains, oil spots, and weathering in just a few hours!
After you rake up leaves, get rid of old annual plants that will look dead and dreary during the winter. Leave the perennials alone, but peonies, hosta, irises, and daylilies can be cut back after the first fall frosts. You can do some light pruning of your trees to shape them up and get rid of dead wood, but save the heavy pruning until winter when your trees are dormant. Mulch for flower beds and around trees and shrubs comes in a variety of colors that can add some zing to the landscape. For the best look, use whatever type of weed eater you’re comfortable with to trim back grass around the edges of all landscape installations.
Fall is also the right time to plant annuals such as chrysanthemums, pansies, and petunias. They can add lively color as the weather begins to cool.
Even if you don’t want to tackle the entire house, a paint touch-up or a change in color on trim, doors, and shutters can make a world of difference. Peeling and worn paint is an instant turn-off for potential buyers. Color fashions change, and your white shutters and door may look worn and outdated. The trend for trim is toward bold, so you can consider reds, deep blues, greens, or even black.
Your front door is the first thing visitors and potential buyers notice, so make sure it gets a fresh coat. Don’t forget your garage doors, especially if they face front. They usually take up more than 50 percent of the facade, so consider giving it a trendy look with a coat of wood-look paint.
Attention to small details will add pizzaz to your home’s appearance. New door hardware, address numerals, and mailboxes can freshen up your entryway without breaking your budget. A wide selection of stylish new ones is available through online retailers and at home and garden centers. Sometimes the old plain-Jane porch light gets overlooked. You’ll find a wide variety of attractive styles nowadays. Over time, window screens sag and fray. Replacing the old fabric is easy with a rolling tool.
5. Make It Look Inviting
Potted plants at your entryway or on the porch give your house a homey look. If you have room, add a garden bench and a small table. An autumn wreath on the door can be a nice touch.
As the days grow shorter, prospective buyers may drive by your home or even book a showing in the evening. Well-placed outdoor lighting at corners, along flowerbeds, and along a walkway will give your home a cheery appeal. Many outdoor lighting kits on the market are programmable and have LED bulbs that use very little electricity and last a long time.
Even if you’re not putting your home on the market, fall is a great time to shape up your house and landscape. Make good use of these wonderful days when the blazing heat of summer has faded away — and before the frigid days of winter blow in!
Becky Moore calls herself a dedicated DSIY — a “Do-Some-of-It-Yourselfer” — who writes about home and landscaping issues. She and her equally handy husband have moved into and refurbished a new (to them) house every two years for the past decade.]]>
https://gianigranite.com/blogs/giani-101-blog/5-easy-ways-to-boost-your-home-s-curb-appeal2019-09-30T09:12:00-05:002019-09-30T09:14:56-05:005 Easy Ways to Boost Your Home’s Curb AppealBrenna FoleyMore]]>
We are excited to share a guest post from our friend, Laura Collings. Laura is a part time digital marketer and full-time real-estate junkie. She guest writes for a wide range of publications, generally centered around DIY home improvements. Enjoy!
The interiors of our home are usually what we pay more attention to and tend to neglect how it looks on the outside. The exteriors of our homes are the first thing someone would notice. That is why it is essential to put some thought into how we can add more curb appeal to our homes.
Boosting your home's curb appeal requires a little planning and a little effort on your part. There are numerous ways of improving your exteriors, and here we discuss five such easy ways to boost the curb appeal of your house.
Keep it clean
One thing that is most off-putting, inside or outside a house, is the presence of clutter and mess. Just as you try to keep your home's interiors clean, it is equally important to keep the outside clean as well. A clean surrounding naturally makes a house appear prettier. Avoid dumping unused items outside, remove any old empty planters, discard old rusted garden furniture, get rid of dead plants and clear any other mess lying around the front of your house. Also, make sure that the garbage bins are not kept on the front where they are openly visible. Keep them at a place where they remain hidden from sight.
The more clutter-free the approach to your house is, the bigger and prettier it will appear.
Maintain the lawns
Lawns are meant to make your house look prettier and enhance the look of your exteriors. But that is only possible when the lawns are well maintained. A lawn that is uncared for, only makes the outside appear messy and uninviting. Overgrown grass and weeds are not just unappealing to look at; they also become breeding grounds for insects and pests.
Mow your lawn regularly, water the plants and trim off any dead branches and leaves. A well-groomed garden with its greenery can add a lot to the curb appeal of your home.
Improve the appearance of your garage door
Although this usually slips our mind, the facade of your garage is also a part of your home's exterior. The garage door is usually towards the front of your house, and that is one element that makes or breaks the overall look of your house. That is why it is important to maintain your garage door’s appearance as well.
Get good looking garage doors made by a reputed manufacturer. Garage door specialists Doors Direct suggest the best way to maintain your garage door is by lubricating the hinges, springs, rollers, and tracks every three months. Additionally, keeping the door clean, removing clutter and painting it from time to time is a great way to increase the value of your home. One extremely useful product in this regard is Giani's Wood Look garage door paint. If you want your neighbors to envy how your home looks, use Giani's Wood Look paint on your garage doors and just wait for the never-ending praises.
Add some decor at the front door
The front door of your house is the main entrance to your world. So making it look good is imperative. Adding some decor to the front door shows the effort you have put into making your home look good. One of the most popular decor items for doors is a wreath. Hanging a colorful and glittering wreath to the front door gives a warm welcome to visitors and makes you feel festive every time to get home. Choose a wreath that is suitable for all seasons. Apart from this, you could also add a beautiful and elegant door knocker that goes well with your home's facade. These little elements can make a great difference to your home's curb appearance.
Clean the front approach
The approach to your house must look inviting. So keep the path clean and defined. Sweep away any dirt or dried leaves lying around, regularly. Wash the approach at least once a week to get rid of dirt and mud left from shoes or tires. A clean approach adds a lot more to your home’s appearance.
]]>
https://gianigranite.com/blogs/giani-101-blog/giani-kitchen-makeover-series-painted-butcher-block-island2019-07-23T10:23:00-05:002019-07-23T10:23:46-05:00Giani Kitchen Makeover Series: DIY "Butcher Block" IslandGiani Inc.
Get the look of butcher block quickly, easily, and affordably for under $90! Giani Butcher Block Paint Kit allows you to create a faux butcher block countertop in a weekend!
We're back at it again with our newest addition to our blog series: Giani Kitchen Makeover! Continue to follow along with us as we completely remodel the kitchen in our office break room using only our DIY paint kits!
Our latest countertop paint kit is finally here - Giani Butcher Block! We are totally digging how our kitchen transformation is going. It's bright and contemporary, however, we wanted to add a little more warmth to the space with a wood island countertop. Check out this before and after progress:
✨ GORGEOUS! ✨
The Giani Butcher Block island not only adds visual interest, but it adds a sophisticated ruggedness that we love. It pairs so well with our two-tone cabinets!
Get the look of butcher block quickly, easily, and affordably for under $90!
Each Giani Butcher Block Paint kit includes all the paint and applicators needed to makeover 35 sq. ft. of countertop.
The first step to any makeover is planning. Follow along with our how-to video below for project instructions and read here for detailed written instructions.
Creating Butcher Block:
Our prep was simple; we wiped down the island countertop with an SOS pad and rinsed away any cleaning residue with a damp rag. Once it was dry, we could proceed with the first painting step! Be sure to follow the standard Giani Butcher Block prep process (listed in our instructions above), take your time, and your painting should be a breeze!
Now, let's get started!
Start with the first coat of the Wood Base Primer. You'll be using a roll on and brush out technique throughout the process. Begin by rolling on the primer. Don't worry about lap lines, roll direction, or getting it to a perfect coverage since you'll be able to attain full coverage with your second coat.
Once you've rolled on the primer, use your roller to lightly prime the edge of your 11" foam brush. This will help the brush glide more smoothly across your surface. Use the 11" foam brush to smooth out the paint in long, one-way passes following the length of your countertops. This will help in building a natural grain effect. And, don't forget to finish your edges following the same direction as the top brush strokes!
Let your first coat dry for 2 hours and then repeat. Be sure to cover your paint tray with foil and put your roller in a zip-lock bag to keep it fresh for your second coat.
For this next step, you'll use the kit's included FrogTape® to tape and "measure" out your butcher block boards. You'll use the width of the tape roll as your guide or "measurement." Begin by aligning the edge of the tape roll with the edge of your countertop surface, then mark lightly with a pencil where the width of the tape roll ends. Place the tape roll against that line and again, mark the end of that width. Repeat this process until you've cover the whole section.
To create the butcher block boards, you'll connect the pencil marks from both ends of your countertop section with a strip of FrogTape®. Tape ever other set of marks.
Check to make sure you don't have any crooked or wrinkled lines and then lightly run over the strips with your hand to smooth it out.
Once you've completed taping your entire section, press over the strips with a credit card to seal the edges and prevent any paint bleed through. Be sure to press firmly!
Then, you are ready to create your Grain Coat mix! Pour the entire 8 fl. oz. of the Wood Grain Coat into the kit's included Mixing Cup. Then, add 4 fl. oz. of water for a total of 12 fl. oz. Stir the paint and water mixture together until fully mixed.
If you have a wide island like we did, then start at the center and work towards yourself. If you have a smaller island, then again, start at the boards furthest away from you and work towards yourself.
We recommend working in about 2 to 3 strips at a time. That way, once you've completed covering your second or third strip, you can go back to the first strip to add any other desired texture. This is because the paint will be slightly tacky, thereby allowing you to create a more natural wood grain effect!
Start applying a light layer of the Wood Grain Coat mix to the surface. Work the paint across the entire board length, going back and making multiple light, end-to-end brush strokes until you've achieved your preferred shade of grain coverage.
Tip: If you put a lot of pressure on your brush, it will create more defined grain lines. If you brush with a lighter touch, there will be softer contrast.
Cover and seal your Mixing Cup and brush to keep it fresh for your second coat. Allow the boards to completely dry to the tough before removing the tape.
Wait 2 hours before moving on to applying the second set of butcher block boards. This time, there is no need to tape off segments! You'll paint over the blank boards and the painted boards.
But first, we recommend lightly sanding the board section edges with a fine #600 grit sandpaper to smooth out the raised seam created from the tape. (You can feel the raised edges with your hand.) Be sure to use extremely light pressure so you don't sand away too much of the grain coat. Wipe away the sanding dust with a damp cloth and let dry.
Now, this second layer of grain coat will deepen the grain of the previously painted sections, resulting in more contrast between the boards. Again, paint only 2 to 3 strips at a time, and then go back over the previously painted boards to create more texture. Once you're satisfied with your board's shade, let dry for 2 hours.
For the final painting step, you will seal with the protective topcoat. Follow the same painting process for the topcoat that you did for the Wood Base primer, except that you will only need one coat.
Note: The topcoat rolls on with a bluish tint but it will dry clear.
Let dry for 2 hours and then presto, you have a butcher block countertop!!
Stay tuned for new updates on our kitchen makeover. We will be sharing in-depth tutorials and videos for each step of the painting process. Next up is the DIY marble countertop transformation using our upcoming Black Stainless Steel Appliance Paint kit. We can't wait for you to see!
6. Black stainless steel finish appliances(Black Liquid Stainless Steel Appliance Paint, COMING SOON!)*not pictured in design board below*
Pin it, and try out your own Giani Butcher Block countertop makeover when you're ready!
If you are feeling inspired and ready to plan out your own kitchen makeover with paint, be sure to check out our homepagefor all the color and design possibilities! We try our best to match the product packaging/marketing to the true color but paint colors inherently vary on different monitors and the way they appear in each person's unique home lighting and surrounding colors. To work around this issue, we offer hand painted color swatches that we are happy to send out before starting your project.
If you’d like a swatch of our paint products, click on the image below to fill out a swatch request. Or contact ushere.
]]>
https://gianigranite.com/blogs/giani-101-blog/marble2019-07-19T08:16:00-05:002019-07-19T08:17:10-05:00Giani Kitchen Makeover Series: DIY Marble CountertopsGiani Inc.Dreaming of marble, but it isn’t in the budget? Paint your own! Transform any countertop, desktop, worktop, or vanity into a custom carrara marble-like finish in just one weekend! (and for less than $90!)
Welcome back the newest installment of our blog series: Giani Kitchen Makeover! Continue to follow along with us as we completely remodel the kitchen in our office break room using only our DIY paint kits!
We’re so happy to finally share the countertop transformation step of our makeover! We are absolutely loving how the kitchen is developing-- so close to the finish line! It’s so much brighter, and inviting!
Let's take a trip down memory lane to see where our kitchen started and where we're at now:
✨WOW-- major glow up!✨ Now this kitchen is beginning to reflect our office's modern style!
Replacing your countertops can be an overwhelming task to consider-- the cost of materials and labor is steep! But updating your countertop can entirely transform your space. ^See above for case in point! So if you are dreaming of marble and it isn't in the budget, PAINT your own with Giani!
Giani Marble Countertop Paint is a simple, three-step application that will transform Formica®, laminate, Corian®, ceramic tile, butcher block, cultured marble, and traditional granite in a single weekend. Each kit contains all necessary tools and covers 35 square feet of surface, which is the average amount of countertop area in a kitchen.
The first step to any makeover is planning. If you are planning to use both Nuvo for your cabinets and Giani for your countertops, you'll want to set aside two weekends to complete your projects. We recommend painting your cabinets first so that you don’t accidentally get paint on your Giani finish.
Follow along with our videos for project instructions and read here for detailed written instructions.
Giani Marble Countertop Paint
Prep is simple; just a thorough deep cleaning with an SOS pad and then rinse off the residue with water. There is no need to sand for standard Laminate/Formica countertops-- but if you have cultured marble counters, we recommend a light sanding using a fine #600 grit sandpaper to degloss the surface. Then, tape off all the area's you don't want painted and protect your cabinets and floors.
Now, comes the most satisfying part--- painting on your new White Marble Base. So long old counters, and hello marble!
You'll start by using your 2" foam brush to edge in any corners/detailing and use the roller to fill in the rest! Work quickly as to always leave a wet edge. We recommend working in about 3 foot sections-- continue the process until your entire countertop is covered.
Let dry for 4 hours and repeat the process for a 2nd coat. Your first coat will be streaky, but don't worry, you should reach full coverage on the 2nd coat. Let dry for 4 hours.
While your primer is drying, it’s a great time to research examples of marble finishes so you can get an idea of the vein style you would like to mimic and study how to create the most realistic veins. Or you can go one step further and purchase a marble sample board at your local home improvement store.
You can also spend this dry time mapping out the direction in which you want the veining of your marble to flow. It helps to draw the basic layout of your kitchen and then create a vein guideline for yourself.
Use the kit's included practice board to try out the veining technique before painting on your countertops. Keep in mind that the board will soak up some of the paint+water moisture so you will not be able to blend as you would on your primed countertop.
Now that all the prep work is complete, it's time to start painting on the veins! This is the step that really transforms it into marble. Remember to take your time, be patient and blend, blend, blend!
Begin by gently holding the end of your artist brush, with an open palm or loose grip, and drag the Grey Veining Paint across your countertop. Slightly wiggle or twist your brush as you drag to create natural waves and flows. You don’t want to paint a perfectly straight diagonal line!
Then mist your vein with the water from about a foot away using your kit’s included Misting Bottle. You’ll know you’ve used enough water when the paint starts to bleed.
Next, lightly dab, feather, and/or stipple your vein using your dry Softening Brush. Blend to your preference. You can also use a paper towel to remove any extra moisture or blend the vein further. We recommend studying our how-to video to see the blending in action.
Continue adding veins across your countertop. For the most natural look, vary the look of each vein and build upon veins by creating branches or ripples.
It can be tempting to work too detailed or want to fill in every single white space with veins—but remember if your veins are too busy, you could risk your finish looking more like a zebra pattern. We recommend starting with 2-3 main veins per 3 foot section so that you have room to fill in later should you want ghost veins or highlights. It’s always easier to add more veins than it is to take away after it has dried.
If you mess up a vein or don’t like how it looks, no worries! Mist your vein a few times to flood the area with water and wipe away to start fresh.
For backsplash veins, follow the veins already created on the main countertop surface and connect. Be sure to apply at a diagonal angle for a more natural appearance. Be cautious not to over spray the water and watch for any runs or drips!
Once your major veins are complete, take a step back and evaluate where you would like to add more depth by applying minor shadow veins or “ghost veins”.
You’ll follow the same techniques as you did with the major veins, but make them evaporated and subtle enough so that they don’t distract from your major veins.
To get an evaporated or ghosted finish, over blend the area and feather out your vein so that it looks faded. You may need to spray the area with more water to further allow for a more softened blend or pick up some of the paint product by dabbing with a paper towel. If the area shadowed area becomes too wide for your preference, you can narrow the vein by pushing the paint inward on wither side of the vein—this will help you create a more defined line.
For optional white highlights, first cut your sponge in half. Then, lightly sponge on flecks of the White Highlight paint in any areas on or around your veins for some added depth and texture.
Let your veins and highlights dry for 4 hours.
Now, the final step-- the topcoat! This will give help create a polished finish and protect your beautiful new marble look.
Use your foam brush to edge in any creases or corners and use your roller to fill in the rest! Make sure your roller cover is fully coated with Topcoat.
It’s best to edge in 3-4 foot sections at a time and then immediately roll that section so that your brush strokes blend with the rolled areas. Work quickly as to always leave a wet edge.
Roll on a liberal amount of topcoat onto your countertop section. Remember to keep your roller cover fairly wet as to avoid dry roll. Then, without rewetting, roll back over the area using long one-way strokes to smooth out any laplines.
Don't just live with your kitchen countertops, LOVE them! Our Giani countertop paint kits make it easy to refresh your countertops in just one weekend and for under $100! What are you waiting for?!
Stay tuned in the weeks ahead for new updates on our kitchen makeover. We will be sharing in-depth tutorials and videos for each step of the painting process. Next up is the island transformation using our upcoming Butcher Block Countertop Paint Kit. We can't wait for you to see!
5. Wood finish island top (Giani Butcher Block Countertop Paint Kit)
6. Black stainless steel finish appliances(Black Liquid Stainless Steel Appliance Paint, COMING SOON!)*not pictured in design board above*
Pin it, and try out your own marble makeover when you're ready!
If you are feeling inspired and ready to plan out your own kitchen makeover with paint, be sure to check out our homepagefor all the color and design possibilities! We try our best to match the product packaging/marketing to the true color but paint colors inherently vary on different monitors and the way they appear in each person's unique home lighting and surrounding colors. To work around this issue, we offer hand painted color swatches that we are happy to send out before starting your project.
If you’d like a swatch of our paint products, click on the image below to fill out a swatch request. Or contact ushere.
]]>
https://gianigranite.com/blogs/giani-101-blog/giani-kitchen-makeover-series-painted-subway-tile-backsplash2019-02-05T10:32:00-06:002019-02-05T10:33:28-06:00Giani Kitchen Makeover Series: Painted "Subway Tile" BacksplashGiani Inc.Tile can be expensive and difficult to install-- Our Subway Tile paint kit makes it quick, easy, and affordable to create a beautiful subway tile finish in just a few hours! (and for under $50!)
Welcome back the newest installment of our blog series: Giani Kitchen Makeover! Continue to follow along with us as we completely remodel the kitchen in our office break room using only our DIY paint kits!
We’re so happy to finally share the Subway Tile backsplash step of our makeover! We are inching towards to finish line and absolutely loving how the kitchen is developing. So much brighter, and contemporary! Check out this before and after progress:
✨ POOF! ✨ Now this kitchen is beginning to reflect our office's modern style!
The Giani Subway Tile backsplash helps to polish the space and add visual interest. We love how it pairs with the two-tone cabinets and can not wait to makeover the countertops next! (DIY marble coming soon!)
Tile can be expensive and difficult to install-- Our Subway Tile paint kit makes it quick, easy, and affordable to create a beautiful subway tile finish in just a few hours! (and for under $50!)
Each Giani Subway Tile Paint kit includes all the paint and applicators needed to makeover 30 sq ft of wall space.
The first step to any makeover is planning. If you are wanting to use both the Subway Tile Kit for your backsplash and Giani for your countertops, you'll want to set aside two weekends to complete your projects. We recommend painting your backsplash first so that you don’t accidentally get paint on your Giani finish.
Follow along with our videos for project instructions and read here for detailed written instructions.
Creating Subway Tile:
Our prep was simple; we wiped down all the walls to remove any grime, rinsed away any cleaning residue, and masked off the backsplash area with painter's tape. Just follow the standard Giani Subway Tile prep process, take your time, and your painting should be a breeze!
Now, comes the fun part – painting on your new, gorgeous Subway Tile!
Start with the Grout Base Coat. This is a warm grey shade that will act as primer and will later create the "grout lines". Apply 1 coat and let dry for 1 hour.
Then you'll use the 1/8" tape and template tools to create the grout lines.
The kit's template tools take away all the hassle of measuring! First, use the across line template tool to mark notches on both sides of your backsplash. Then, use the grout line tape to connect the notches-- creating your horizontal grout lines.
Follow the same process using your downline template tool to create the vertical lines.
You'll first make a grid and then later remove alternating lines to create the staggered 3x6 tile pattern.
Use a credit card to seal your taped grid and prevent any potential bleed through. Be sure to press firmly.
Then, you are ready to start creating the staggered tile pattern. Use a box cutter to cut the odd number lines on the bottom row. Then on the row above, cut the even numbered lines. You can see in the image below that line number 2 is being removed. Repeat these alternating steps on every other row until you’ve completed your entire backsplash area.
Now you are ready to apply 2 coats of the tile resin.
You’ll use the same painting technique as the base coat—edge in with a foam brush and then use a roller to fill in the rest. For the first coat, roll on in a vertical direction.
Place your paint applicators in a plastic bag or cover with aluminum foil to keep from drying out before your second coat. Let dry for 1 hour.
On your second coat, applying in a horizontal side-to-side direction. This will help create a uniformed finish. Again, let dry for 1 hour.
For the final painting step, you will seal with the protective topcoat. Follow the same painting process for the topcoat that you did for the Tile Resin.
After your second coat has dried to the touch you may slowly peel off your tape. This is the best part! The tile finish starts to appear and it all comes together.
And just like that, you have a beautiful new backsplash!
Stay tuned in the weeks ahead for new updates on our kitchen makeover. We will be sharing in-depth tutorials and videos for each step of the painting process. Next up is the DIY marble countertop transformation using our upcoming Giani Marble Countertop Paint Kit. We can't wait for you to see!
5. Wood finish island top (Giani Wood Look Paint for Countertops & Bars, COMING SOON!)
6. Black stainless steel finish appliances(Black Liquid Stainless Steel Appliance Paint, COMING SOON!)*not pictured in design board below*
Pin it, and try out your own Giani Subway Tile backsplash makeover when you're ready!
If you are feeling inspired and ready to plan out your own kitchen makeover with paint, be sure to check out our homepagefor all the color and design possibilities! We try our best to match the product packaging/marketing to the true color but paint colors inherently vary on different monitors and the way they appear in each person's unique home lighting and surrounding colors. To work around this issue, we offer hand painted color swatches that we are happy to send out before starting your project.
If you’d like a swatch of our paint products, click on the image below to fill out a swatch request. Or contact ushere.
]]>
https://gianigranite.com/blogs/giani-101-blog/giani-kitchen-makeover-series-cabinets2018-10-18T09:35:00-05:002018-10-18T13:38:00-05:00Giani Kitchen Makeover Series: CabinetsGiani Inc.
Welcome back the newest installment of our blog series!
Painting your cabinets is one of the simplest ways to update your kitchen on a budget. A little bit of paint can make a BIG impact.
Welcome back the newest installment of our blog series: Giani Kitchen Makeover! Continue to follow along with us as we completely remodel the kitchen in our office break room using only our DIY paint kits!
We’re so happy to finally share the cabinet refresh step of our makeover! We are absolutely loving how the kitchen is developing. It’s already so much brighter, and inviting! Check out this before and after progress:
✨ POOF! ✨ Now this kitchen is beginning to reflect our office's modern style!
Painting your cabinets is one of the simplest ways to update your kitchen on a budget. A little bit of paint can make a BIG impact. Our 'new' kitchen is so cheerful compared to the old, drab brown cabinetry. Plus, that new grey wall adds to the pretty, monochromatic vibe that we were going for.
Additional Items you may need for your Nuvo makeover:
FrogTape® Painter's Tape
Roller Trays
Wood Filler for Deep Nicks or Seams
#300 Grit Sandpaper for your Cabinets
TSP Substitute or De-greaser
Screwdriver
The first step to any makeover is planning. If you are planning to use both Nuvo for your cabinets and Giani for your countertops, you'll want to set aside two weekends to complete your projects. We recommend painting your cabinets first so that you don’t accidentally get paint on your Giani finish.
Follow along with our videos for project instructions and read here for detailed written instructions.
Nuvo Cabinet Paint
Our prep was simple; we sanded all the surfaces down, especially high-traffic areas, with a #300 grit sandpaper and then cleaned thoroughly with TSP substitute. Just follow the standard Nuvo prep process, take your time, and your painting should be a breeze!
Now, comes the fun part – painting on your new, gorgeous Nuvo color! We selected the timeless color combo of Navy and White but utilized the trendy application of two-toned cabinets to add more visual interest. If that color combo doesn’t excite you, then take a look at our 9 other beautiful cabinet colors.
You’ll start by brushing on Nuvo on all of your cabinet frames and then you would roll it on the cabinet doors and frames till all of your cabinets are covered. Apply in thin coats to prevent cracking and paint build-up. Then, repeat till you reach full coverage!
Don't just live with your kitchen cabinets, LOVE them! Our Nuvo kits make it easy to refresh your cabinets in just one weekend (sometimes just one day!) and for under $100! What are you waiting for?!
Stay tuned in the weeks ahead for new updates on our kitchen makeover. We will be sharing in-depth tutorials and videos for each step of the painting process. Next up is the backsplash transformation using our upcoming Subway Tile Paint Kit. We can't wait for you to see!
5. Wood finish island top (Giani Wood Look Paint for Countertops & Bars, COMING SOON!)
6. Black stainless steel finish appliances(Black Liquid Stainless Steel Appliance Paint, COMING SOON!)*not pictured in design board above*
Pin it, and try out your own cabinet makeover when you're ready!
If you are feeling inspired and ready to plan out your own kitchen makeover with paint, be sure to check out our homepagefor all the color and design possibilities! We try our best to match the product packaging/marketing to the true color but paint colors inherently vary on different monitors and the way they appear in each person's unique home lighting and surrounding colors. To work around this issue, we offer hand painted color swatches that we are happy to send out before starting your project.
If you’d like a swatch of our paint products, click on the image below to fill out a swatch request. Or contact ushere.
]]>
https://gianigranite.com/blogs/giani-101-blog/get-the-look-for-less-modern-farmhouse-12018-09-21T07:23:00-05:002018-09-21T07:23:27-05:00Get the Look for Less: Modern FarmhouseGiani Inc.More]]>
Get the Look for Less: Modern Farmhouse
Fall in love with this gorgeous modern farmhouse black and white/cream kitchen! We love it's rustic yet sophisticated simplicity. 👌
Recreate the Look:
To recreate this look, try these shades:
For creamy, ivory upper cabinets with a satin finish, use Nuvo - Coconut Espresso, part of our Rustic Collection. Or for an ultra bright white finish, use Nuvo - Titanium Infusion
For ultra black lower cabinets with a satin finish, use Nuvo - Black Deco, part of our Modern Collection. Or for a soft black with a matte finish, use Chalkworthy - Cast Iron
Finish off your makeover with chrome hardware. Pair with black lantern pendant light fixtures. Add contrast with a black herringbone chevron patterned tile floor and a carrara marble styled subway tile backsplash. Tie it all together with a rustic farmhouse dining table and black cafe chairs.
Check out our website for all the color and design possibilities! We try our best to match the product packaging/marketing to the true color but paint colors inherently vary on different monitors and they way they appear in each person's unique home lighting and surrounding colors. To work around this issue, we do offer hand painted color swatches that we are happy to send out before starting your project.
If you’d like a swatch of any of our paint products, click on the image below to fill out a swatch request. Or contact us here.
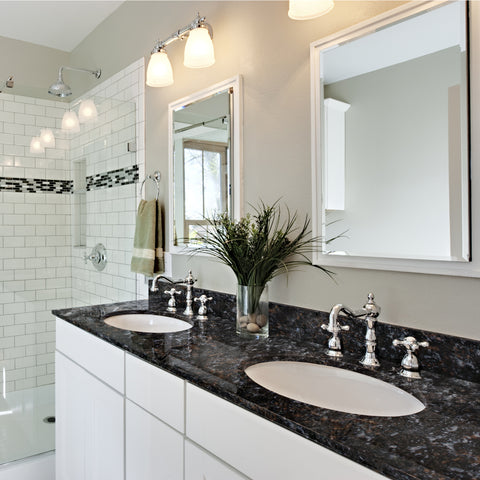
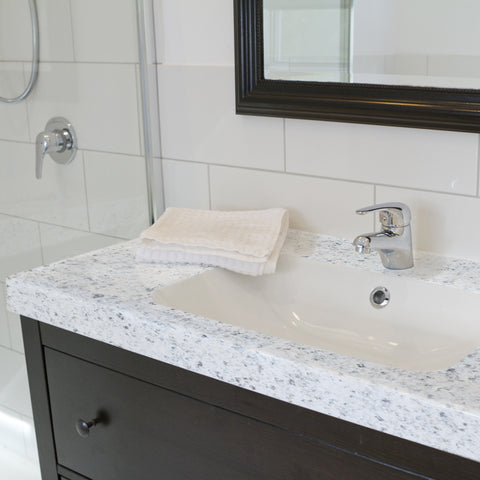


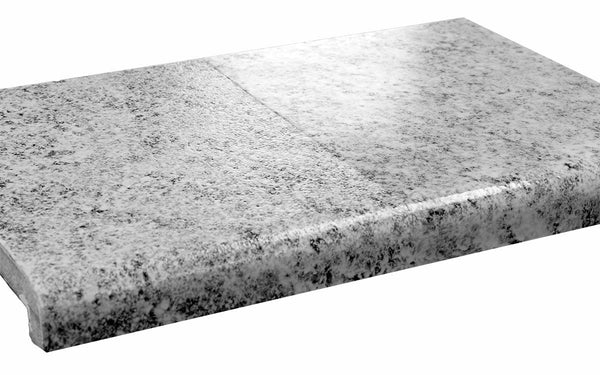


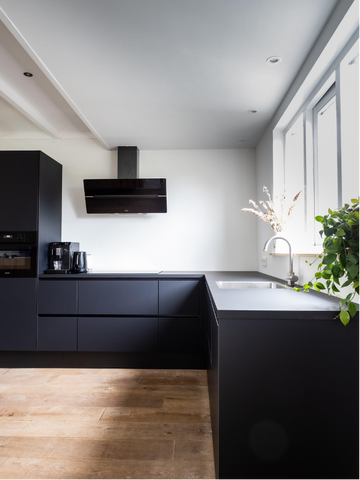


 \
\


 Repeat 2-3 more times, cycling through with the frames, door fronts, backs, drawer fronts, etc. If you DO end up with a bit of cracking, as I did, you can take a small brush and touch up. HOWEVER - Giani warns that if you do touch ups, the finishes may dry differently. So touch up at your own risk! This was sort of true on mine, but I preferred the very slight difference in finish to the cracks. Touching up the spots that cracked seemed to resolve that issue for us, so I'll take no cracks over slight difference in finish! But remember, if you clean like crazy, you’ll have no issues with cracks at all, so strive for that!


